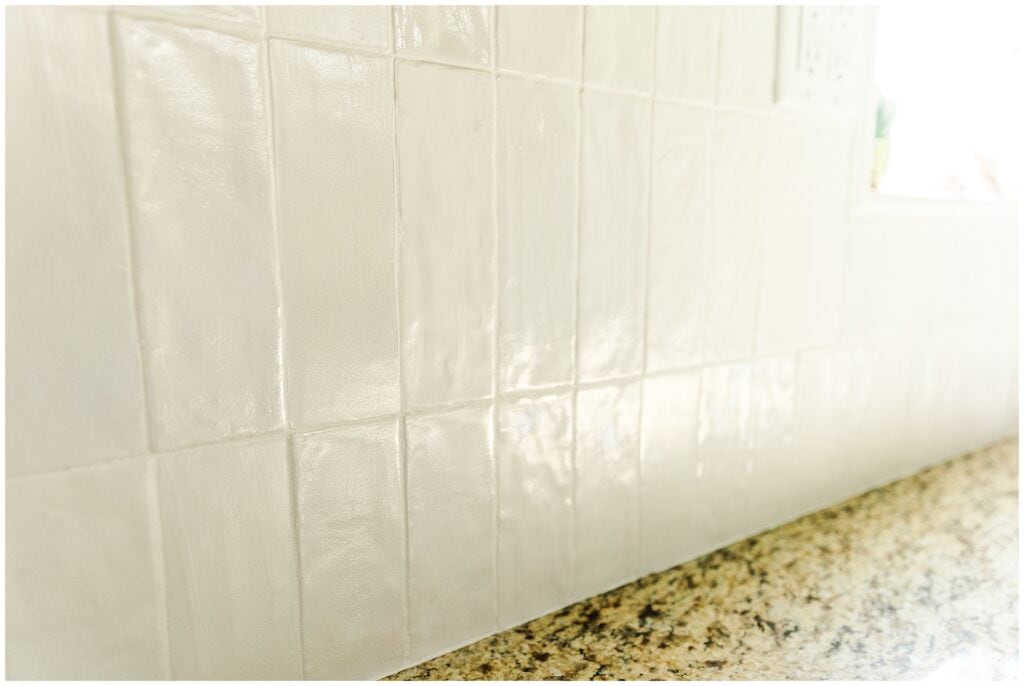
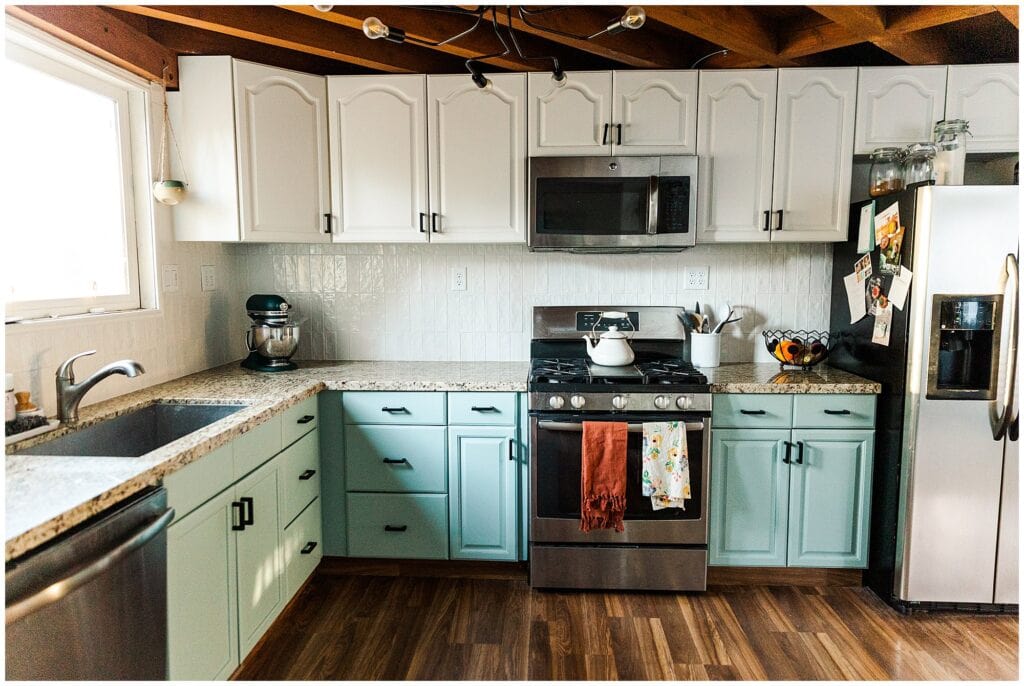
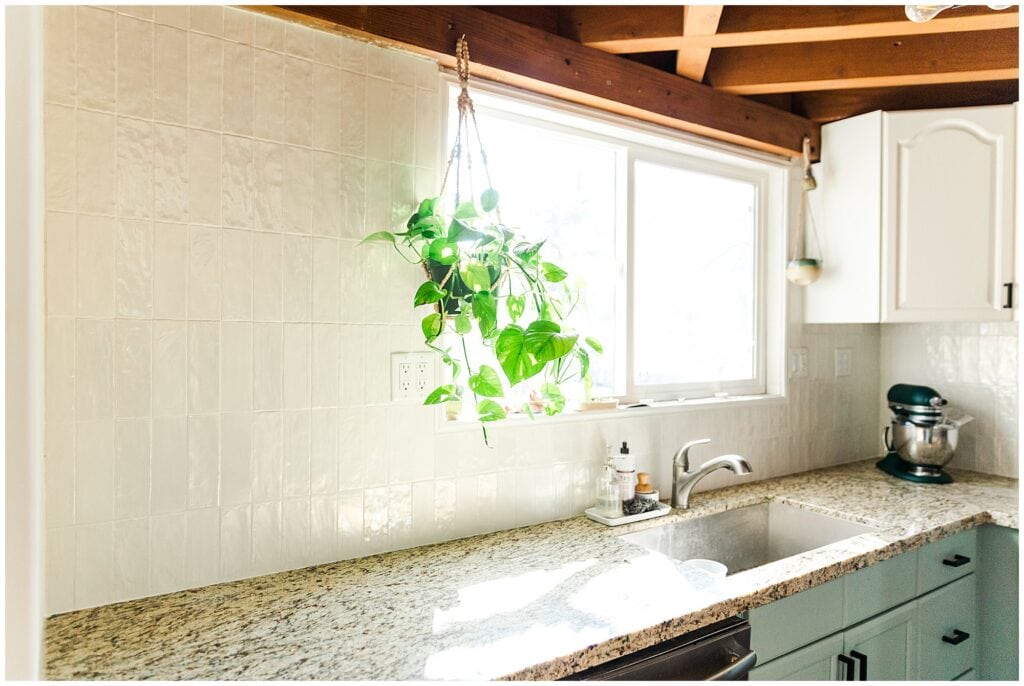
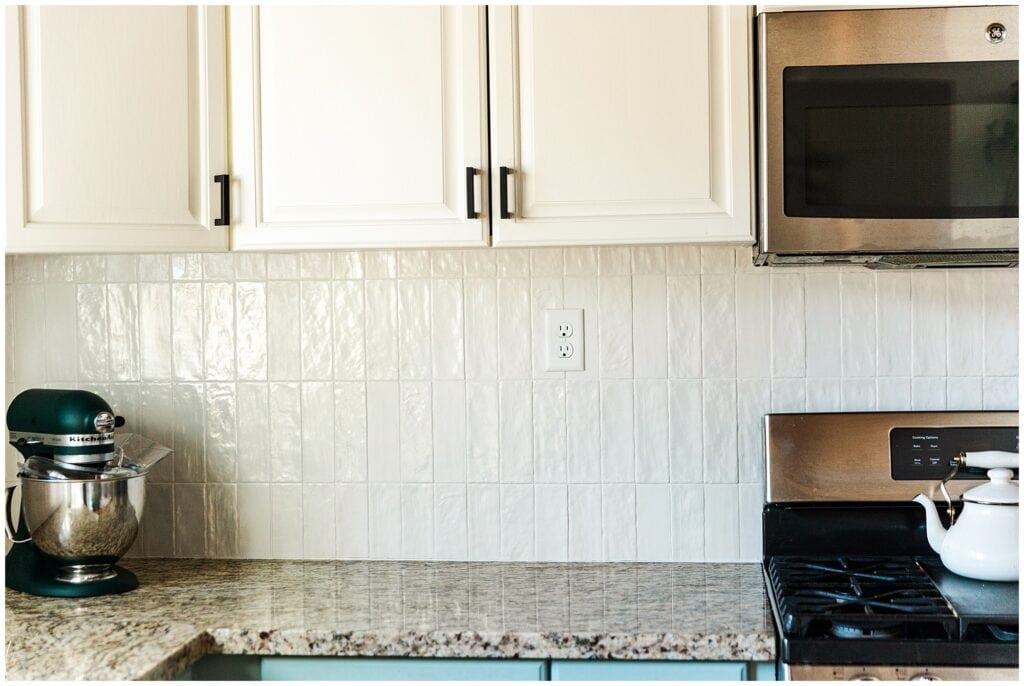
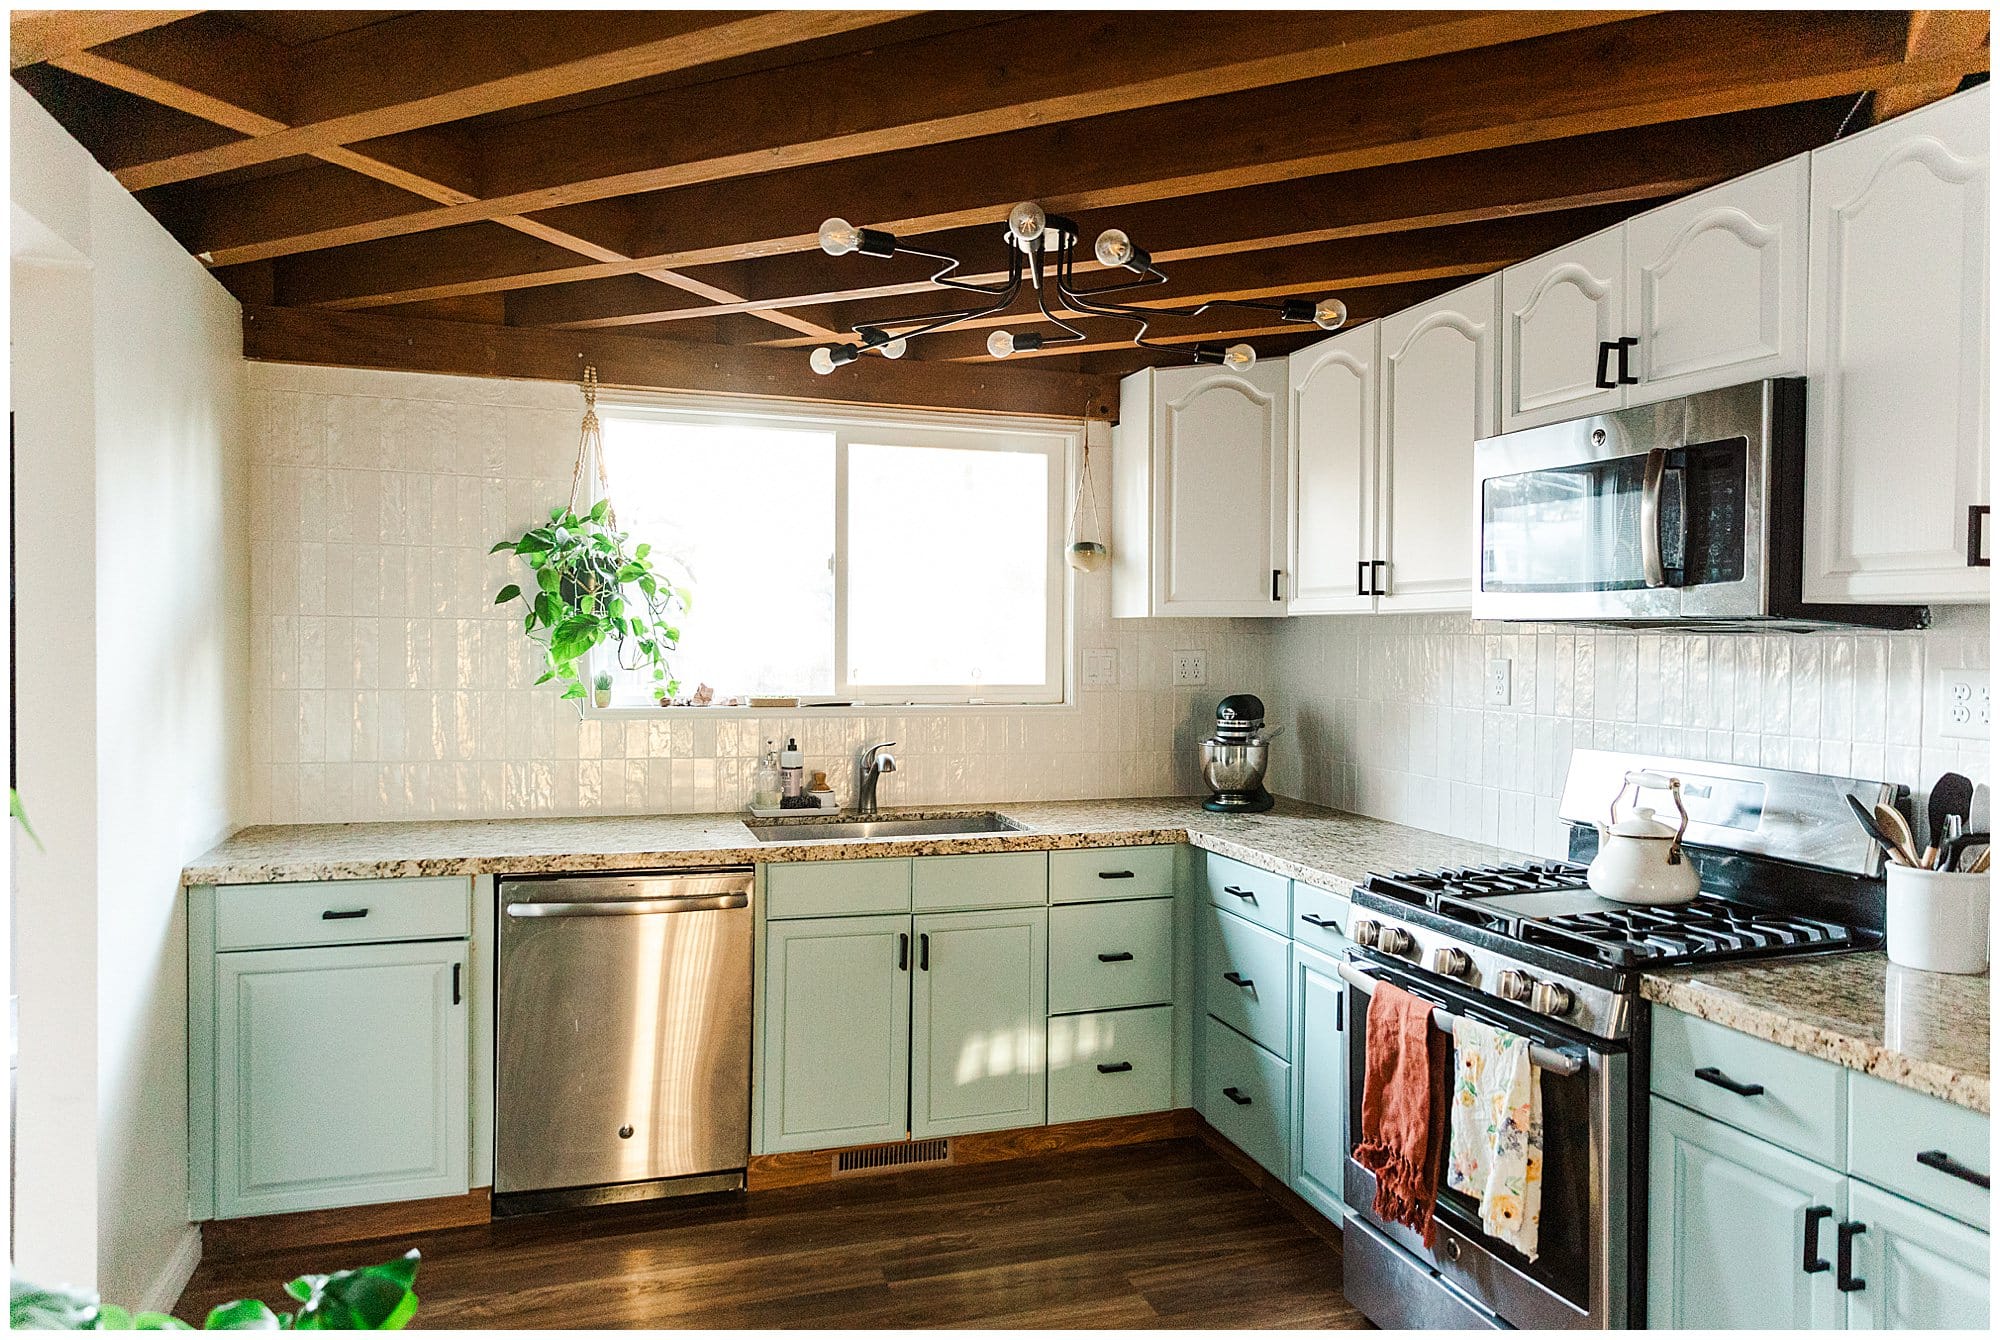
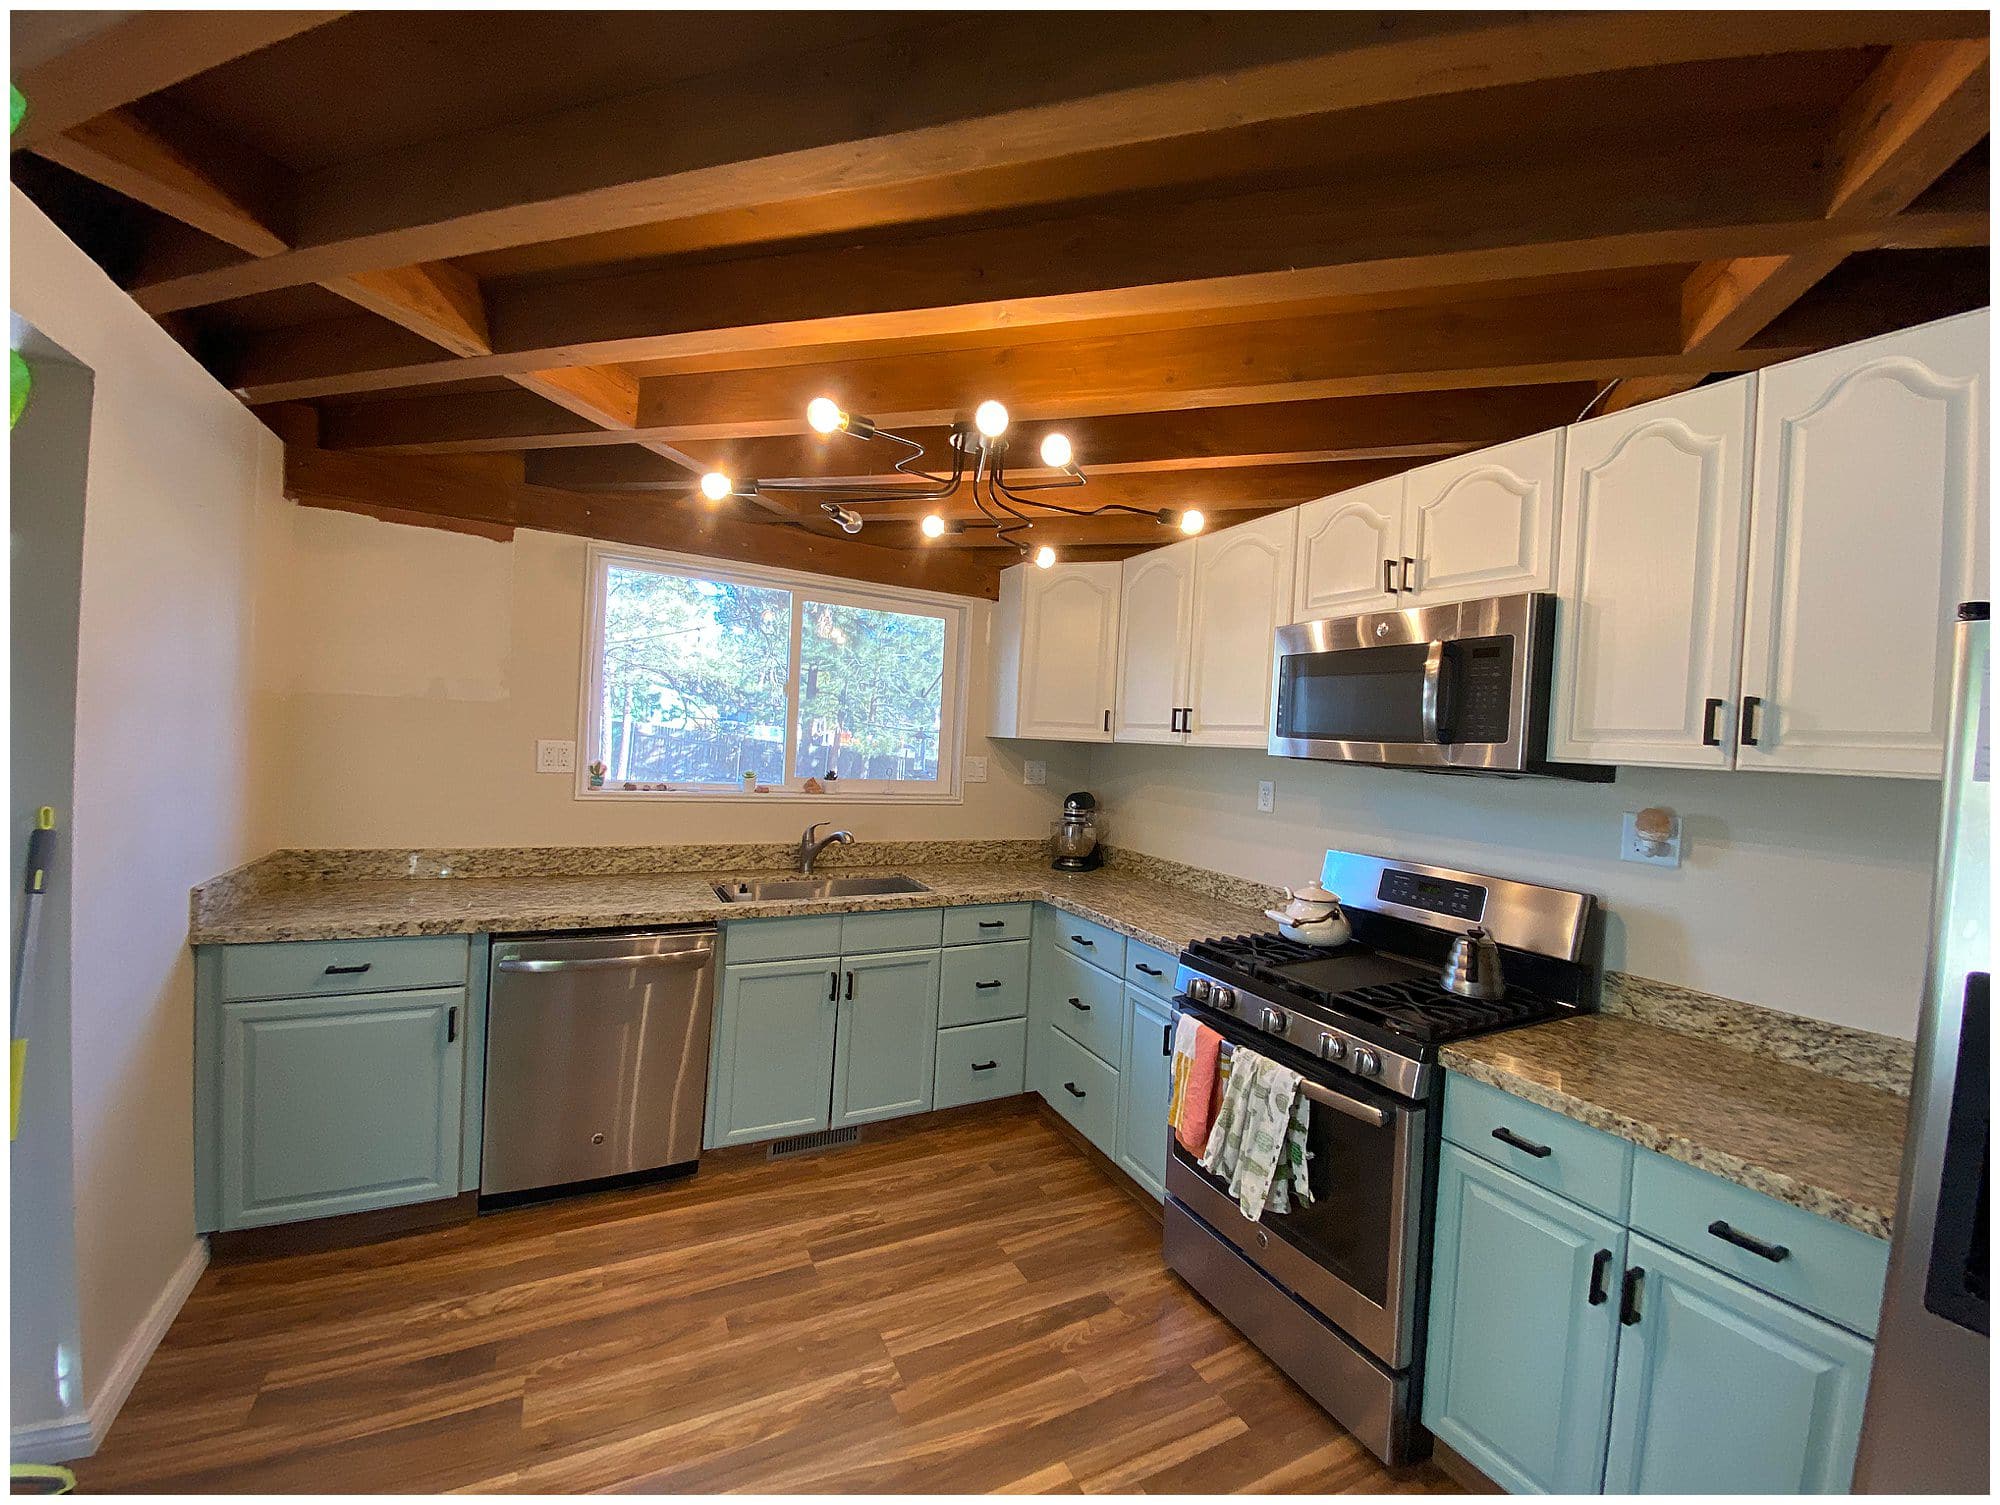
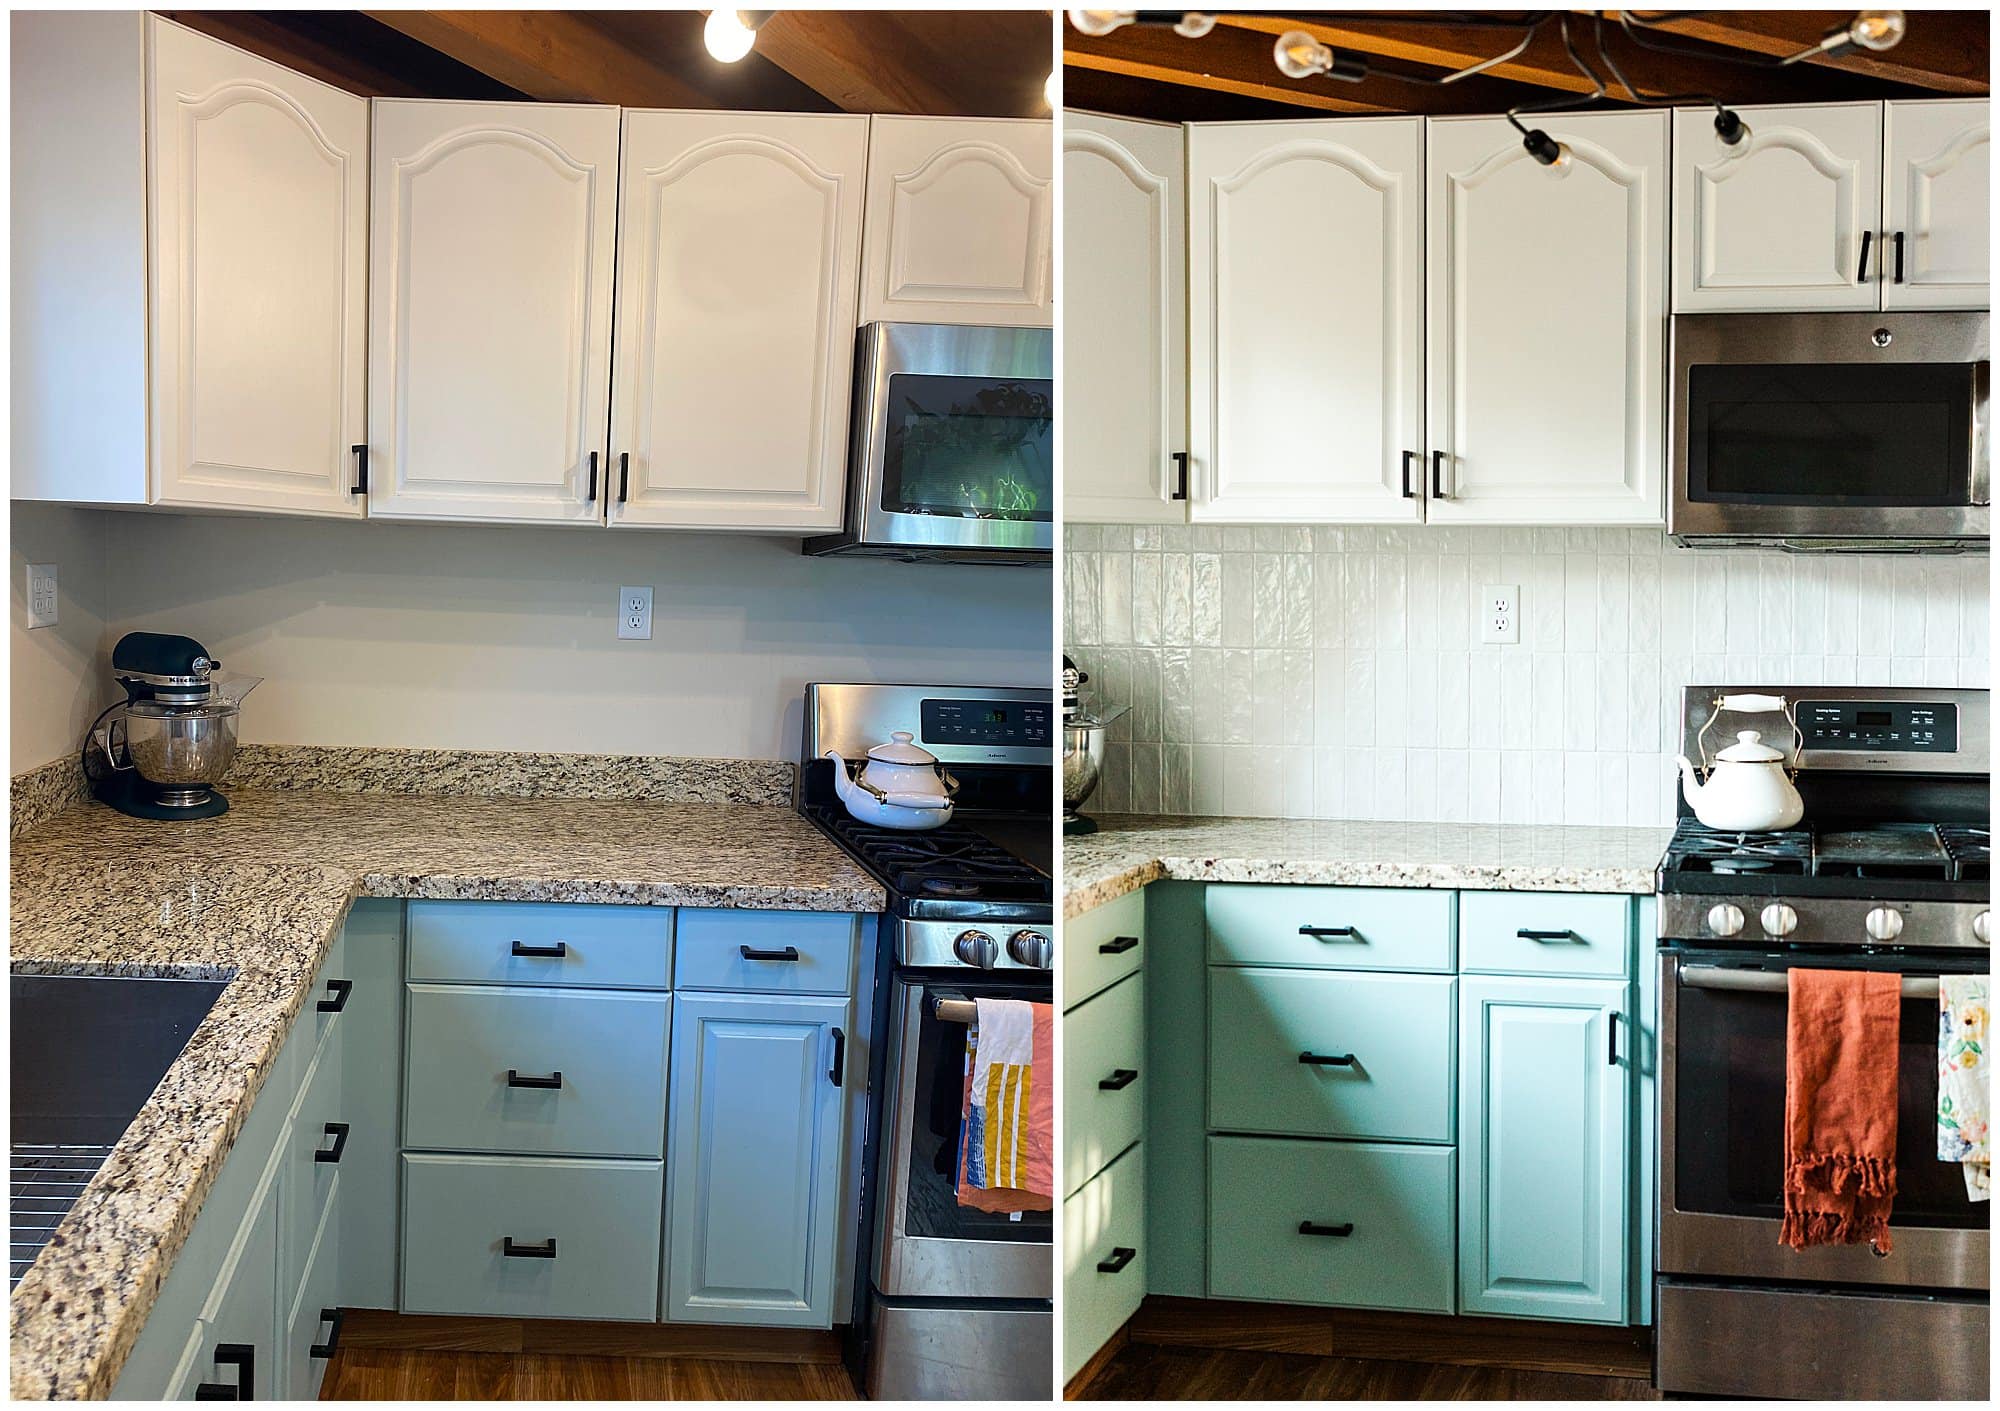
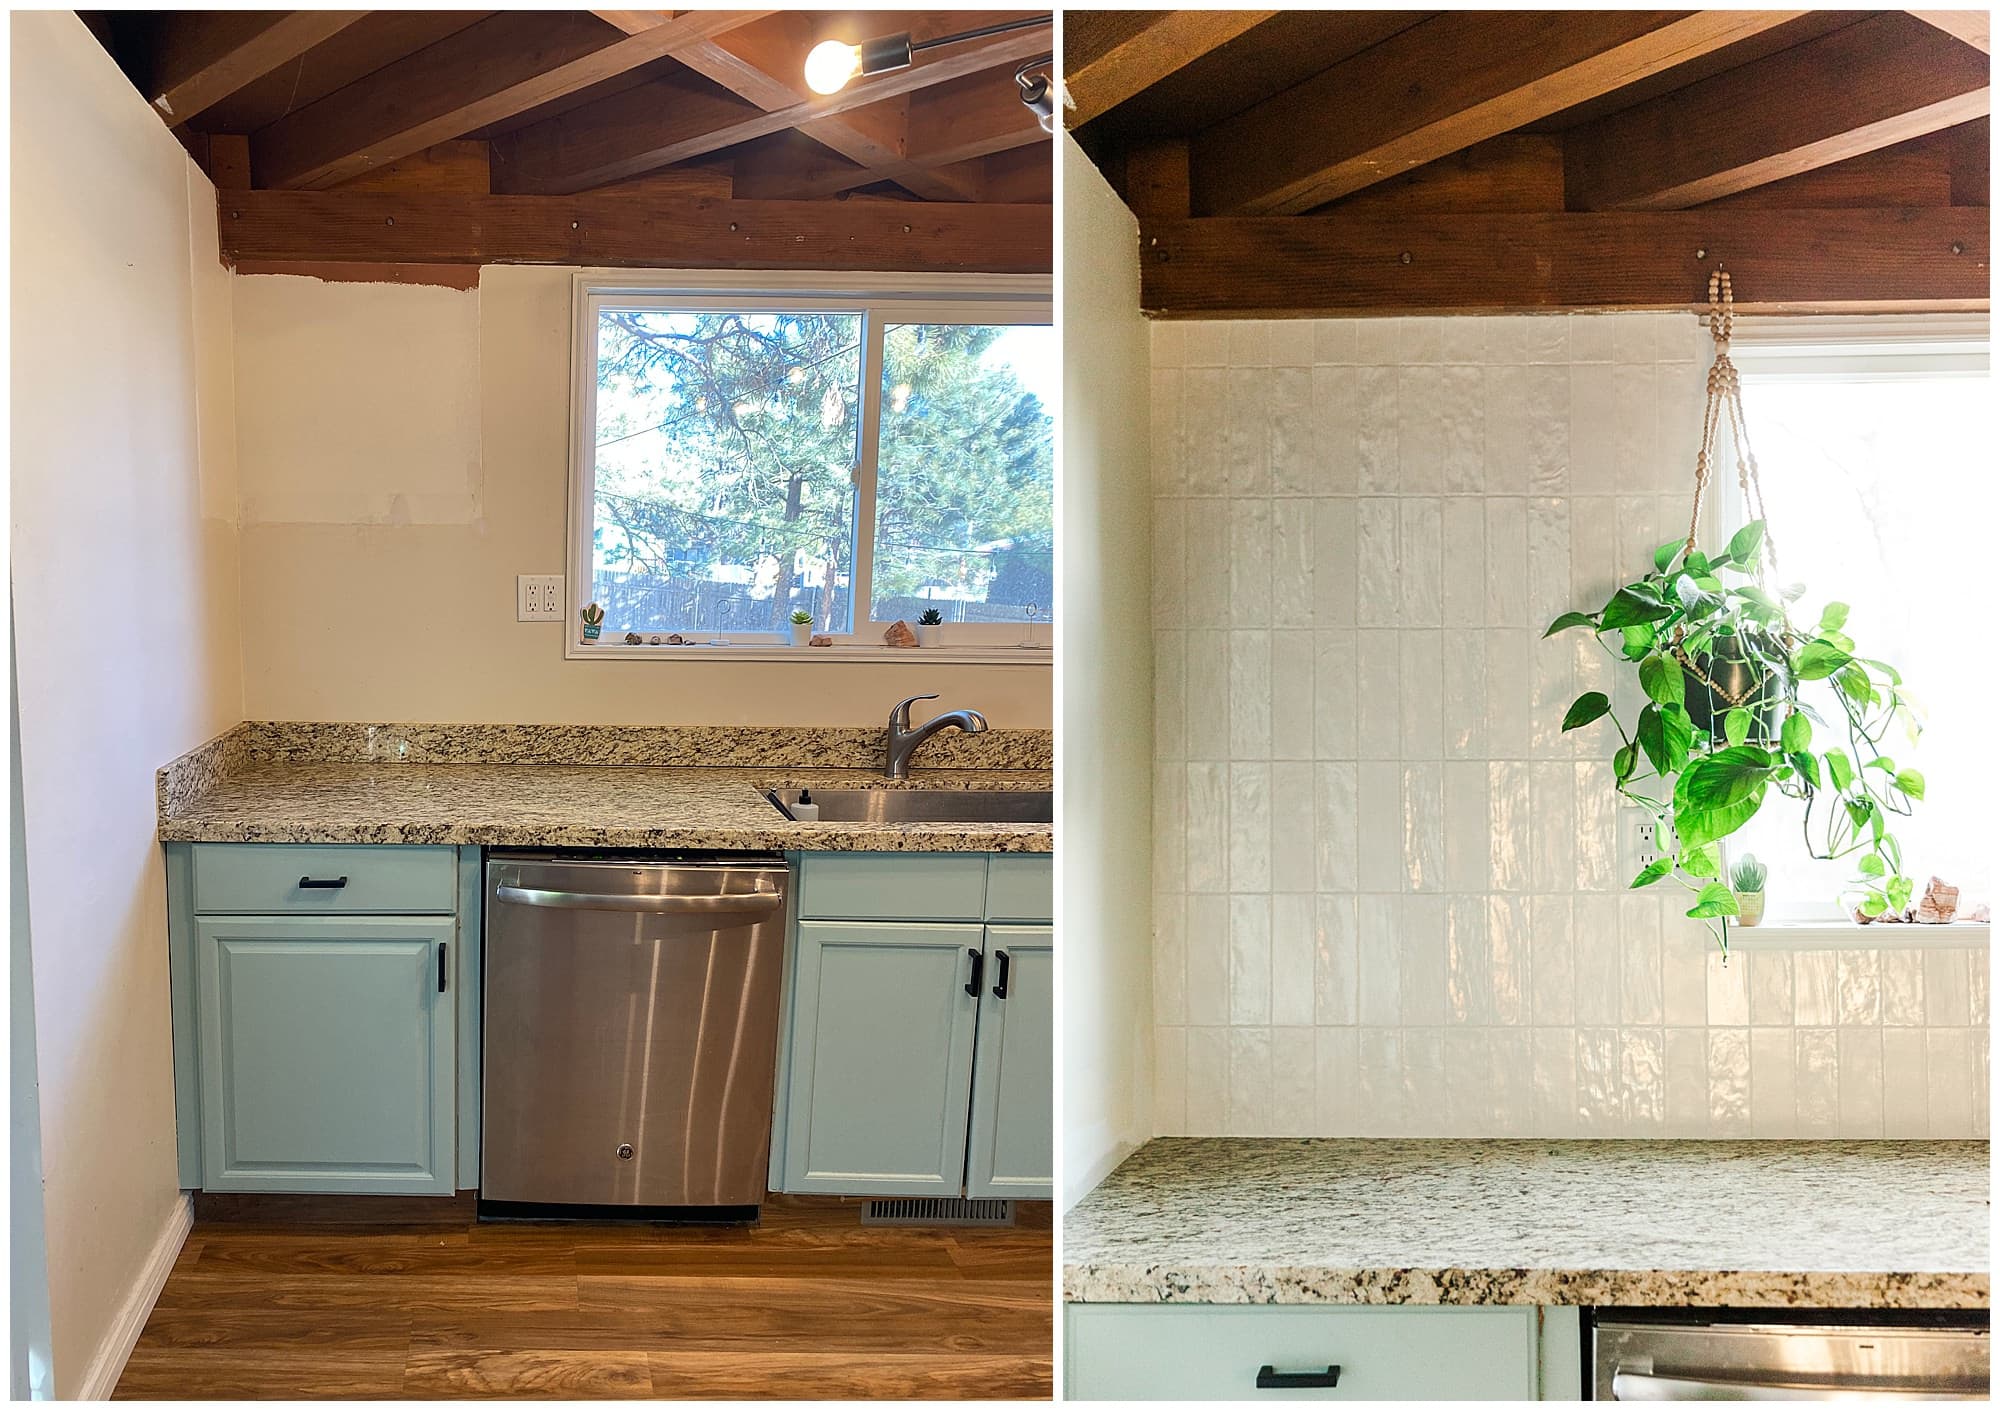
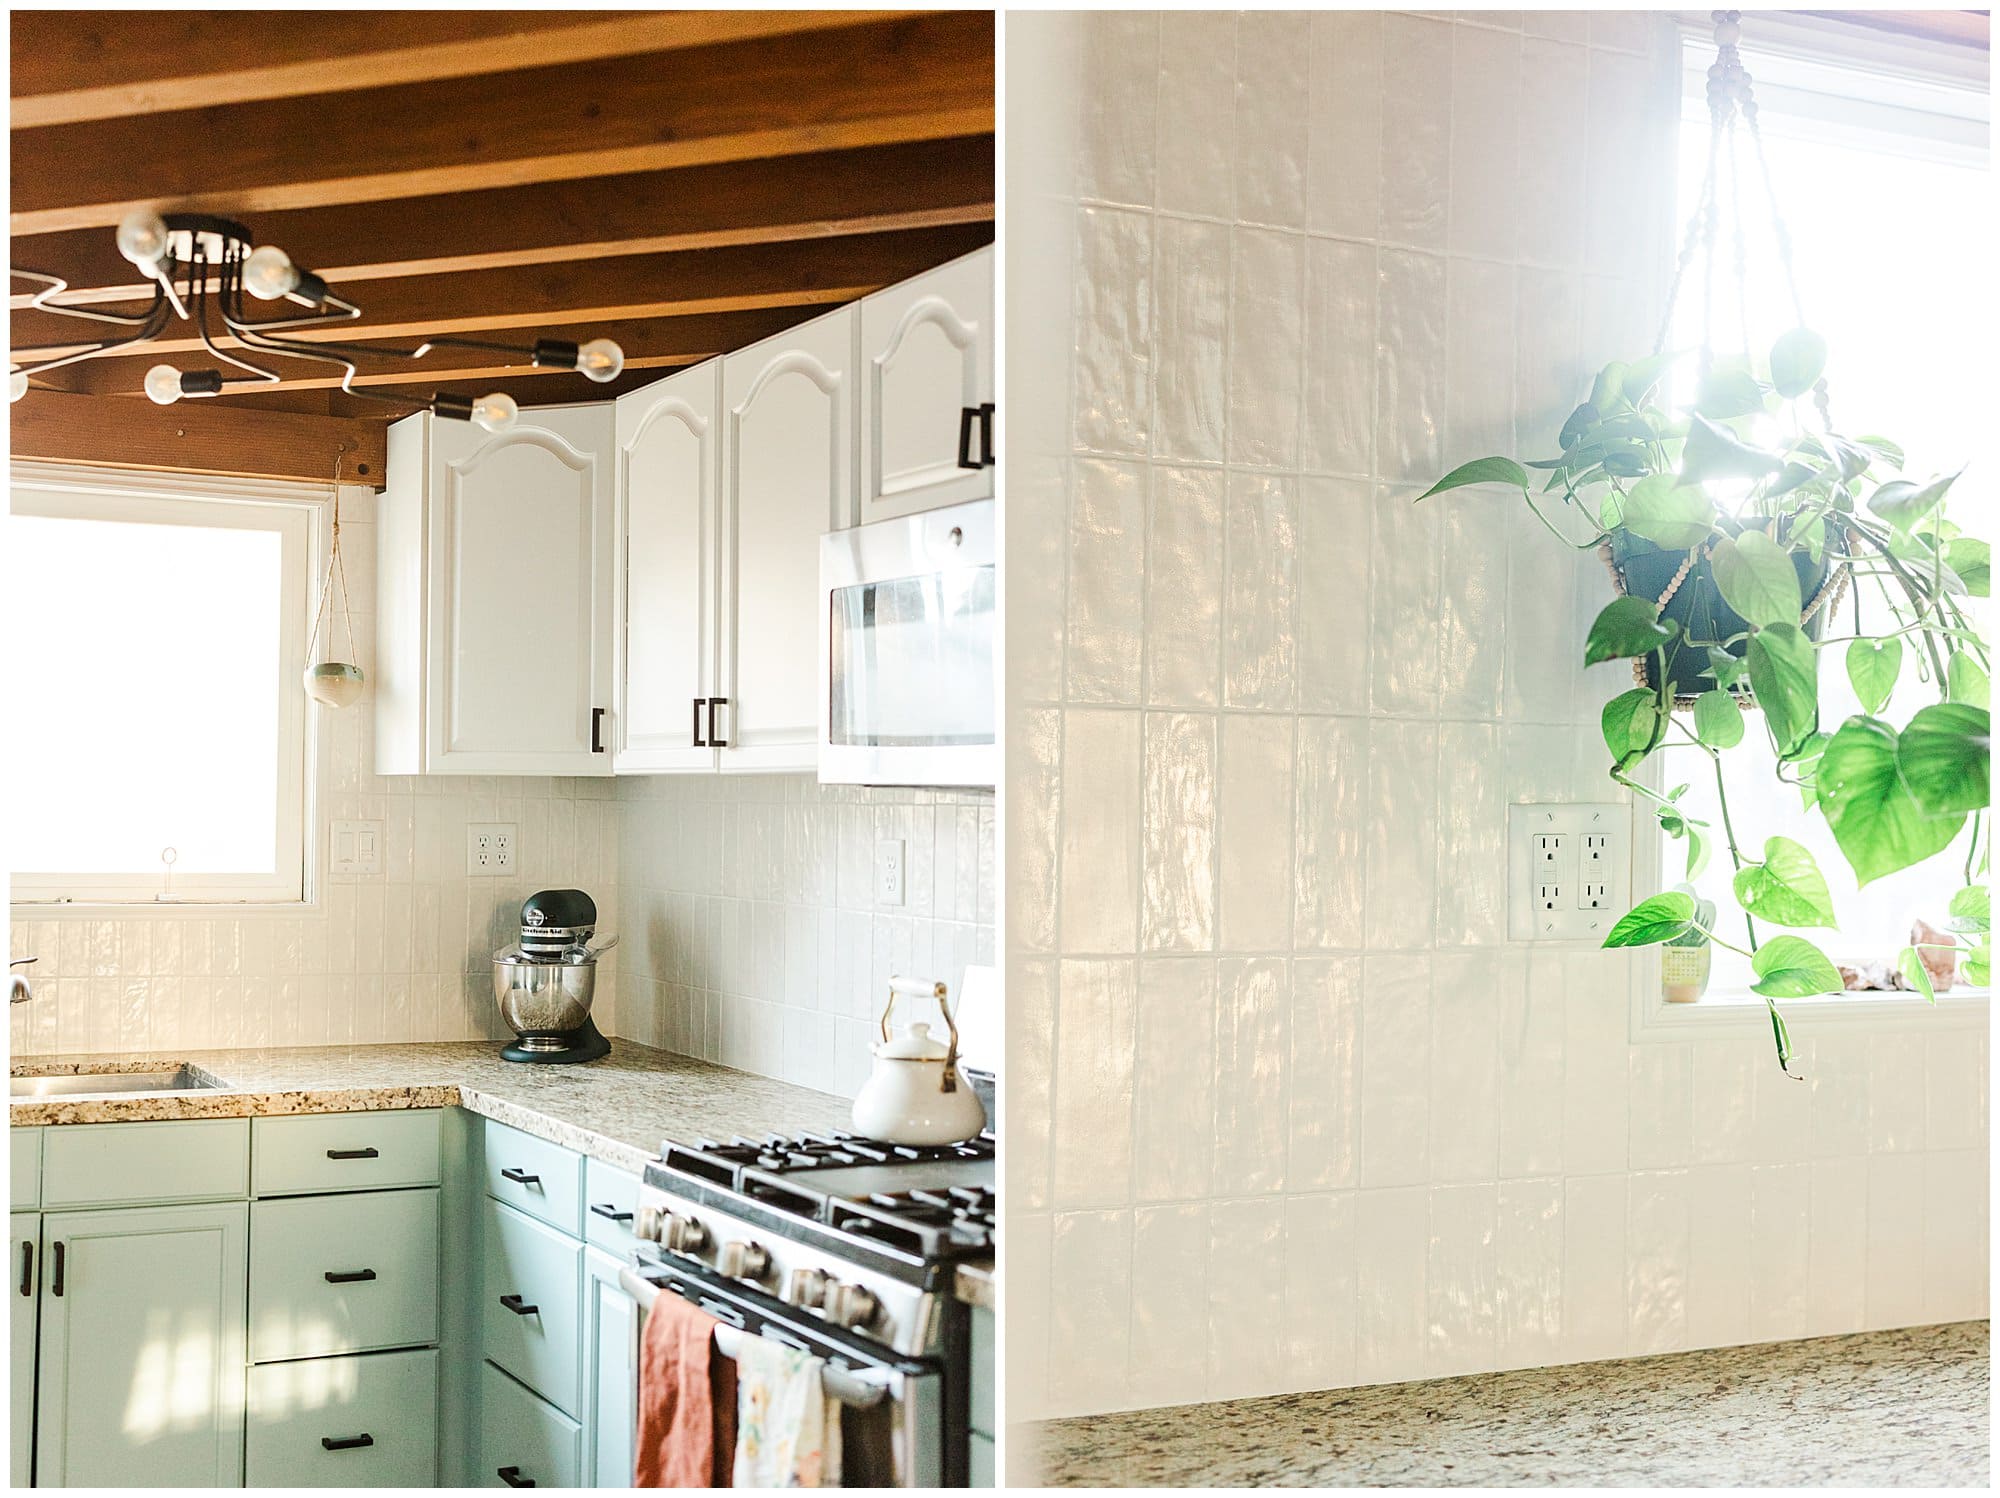
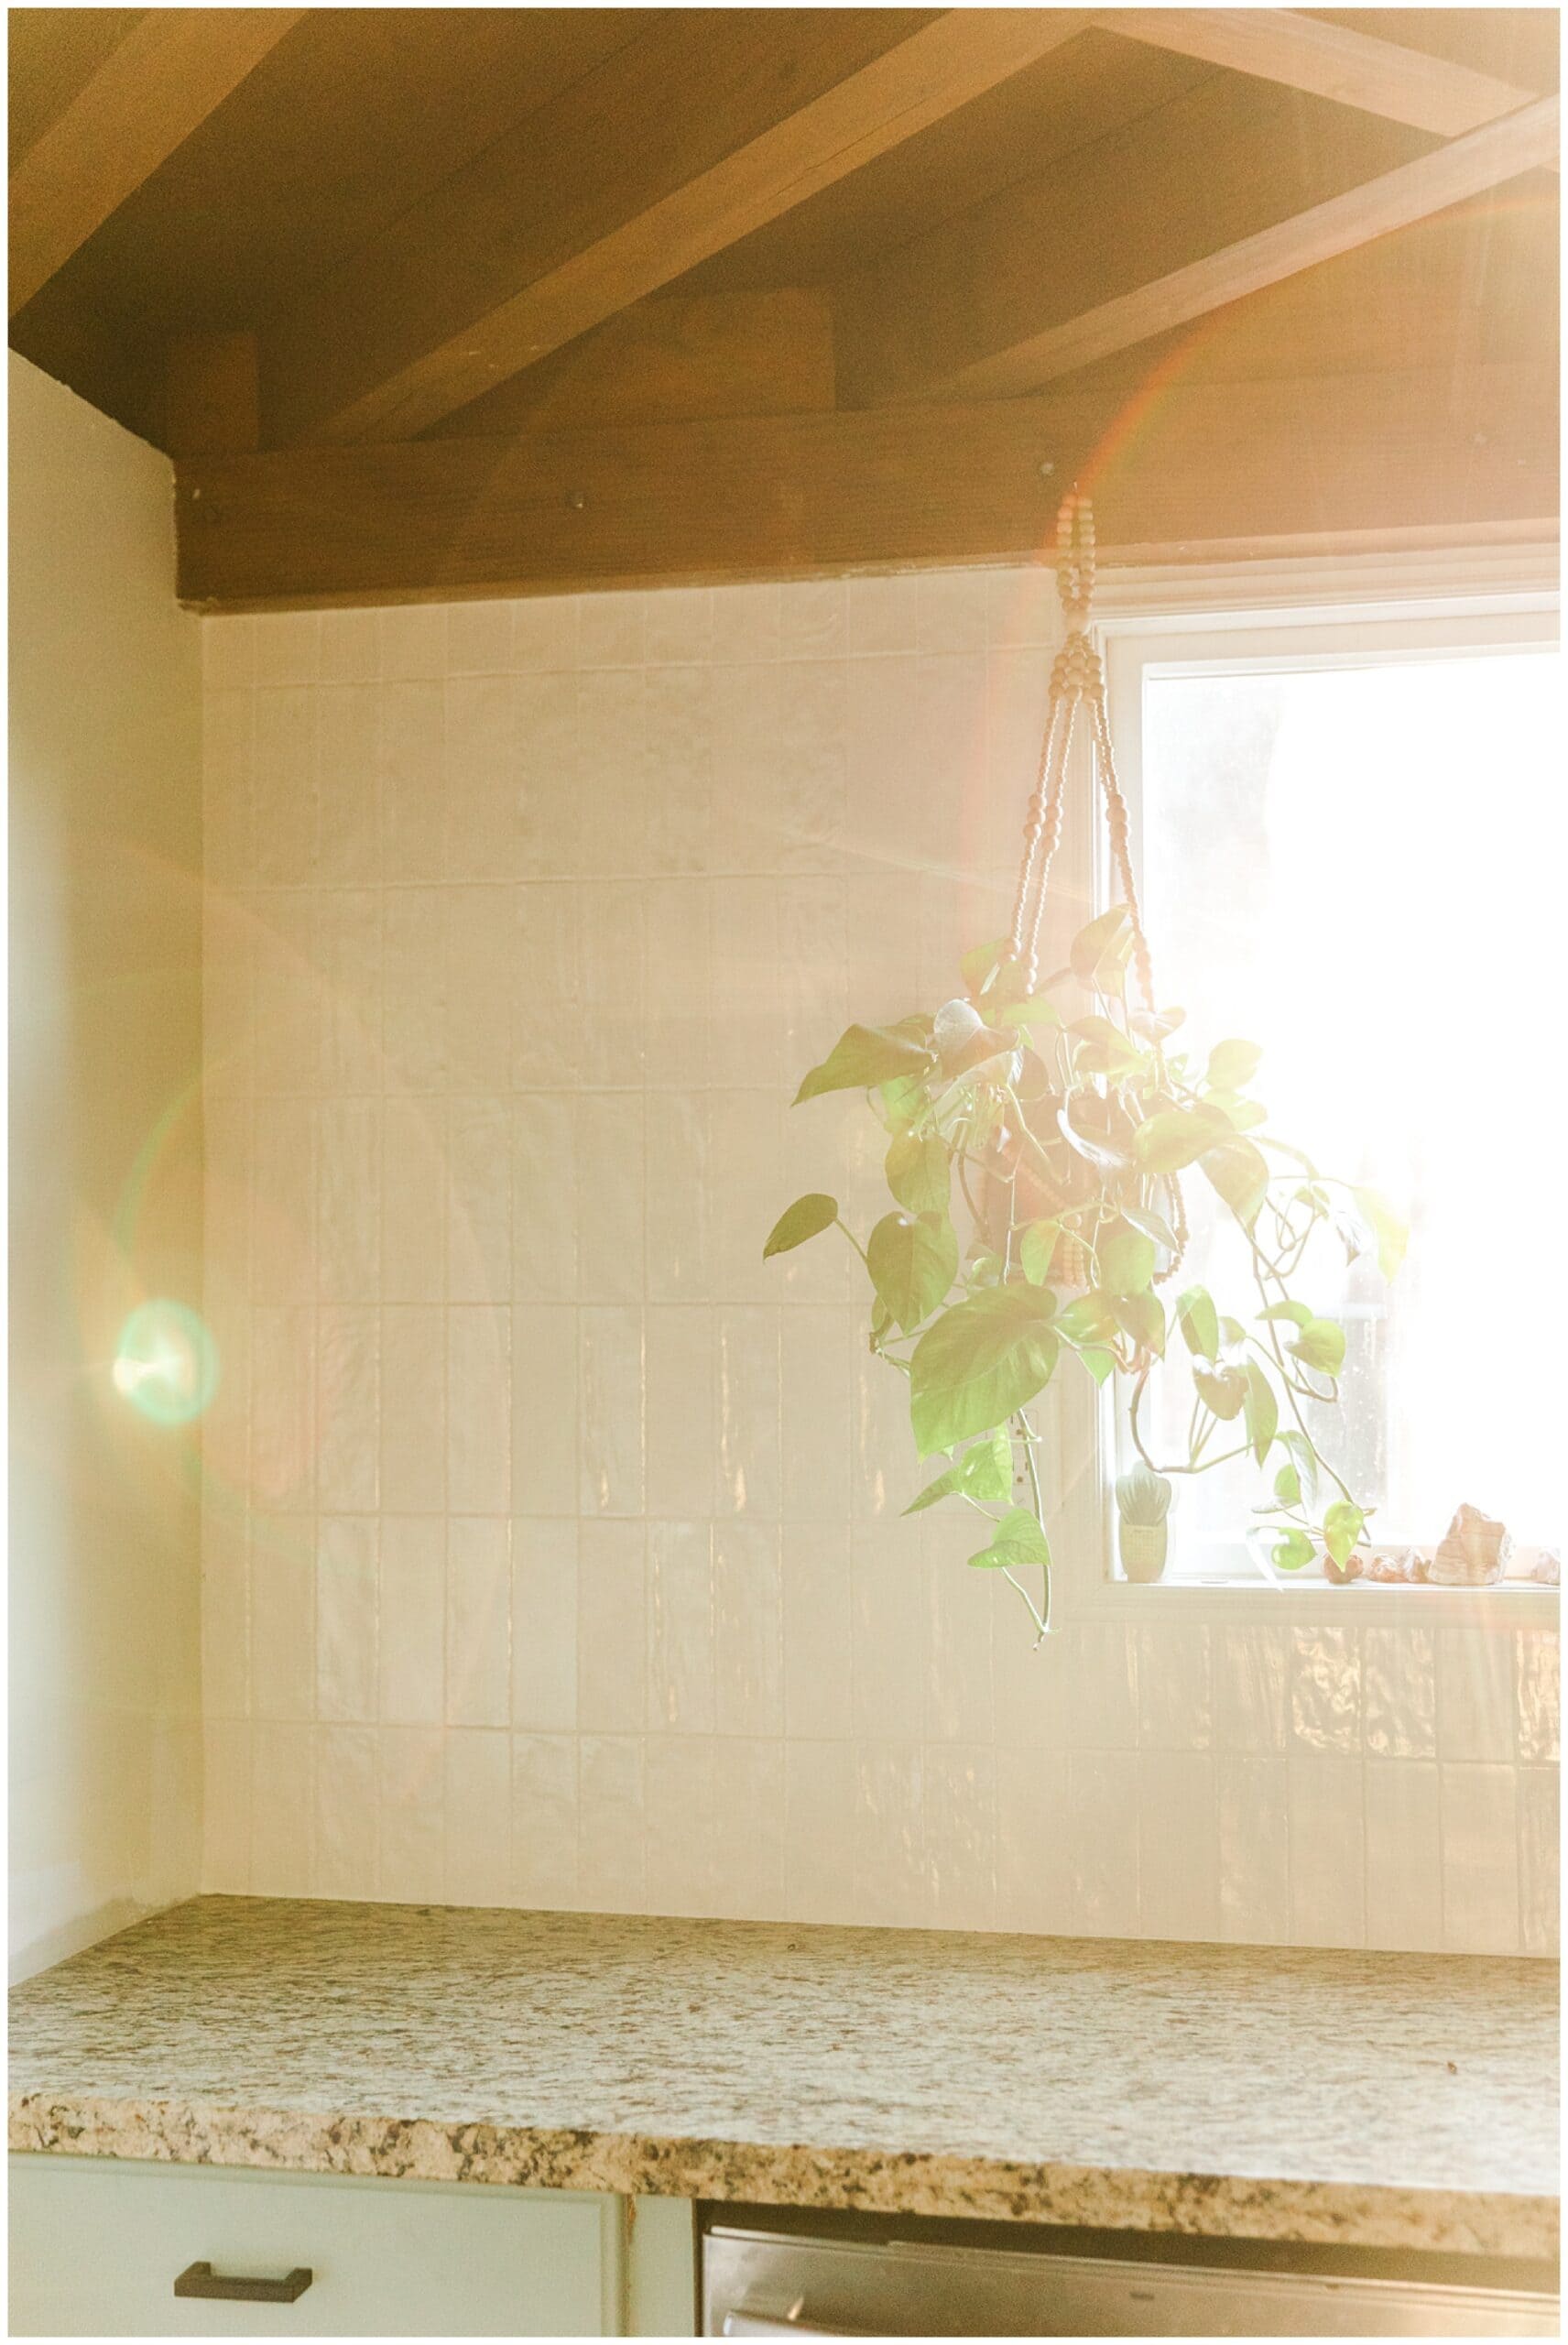
okayyyy my friends. I did it. I figured out how to tile my kitchen backsplash!!!! I was so scared to do it but thank the good lord for YouTube and amazing friends who helped along the way. I had a vision for this pretty white pearl vertical tile. It took me many many months to finally find my favorite tile but I finally found it on Tile Bar. I’m so obsessed with it. The tile I found looks almost like seashells. If I can learn how to tile DIY my kitchen I believe you can! My contractor friend said I saved $3000+ in doing it myself and not paying someone else to do it. I take that as a plus!!
I’m going to write out every step I took…but it could be different for you. I will also attach videos I watched, tools I used, and tricks that may not be professional but worked for me. So come along the tiling journey with me!

ALL THE DEETS ON TILING:
HOURS: 17+ hours. I’m def not a fast worker and when I do this again I will work MUCH faster. Easily done in a weekend if you have all the tools and tile.
COST: $700
- Tile Saw: $99
- Tile: $500 (I have wayyy too much left over)
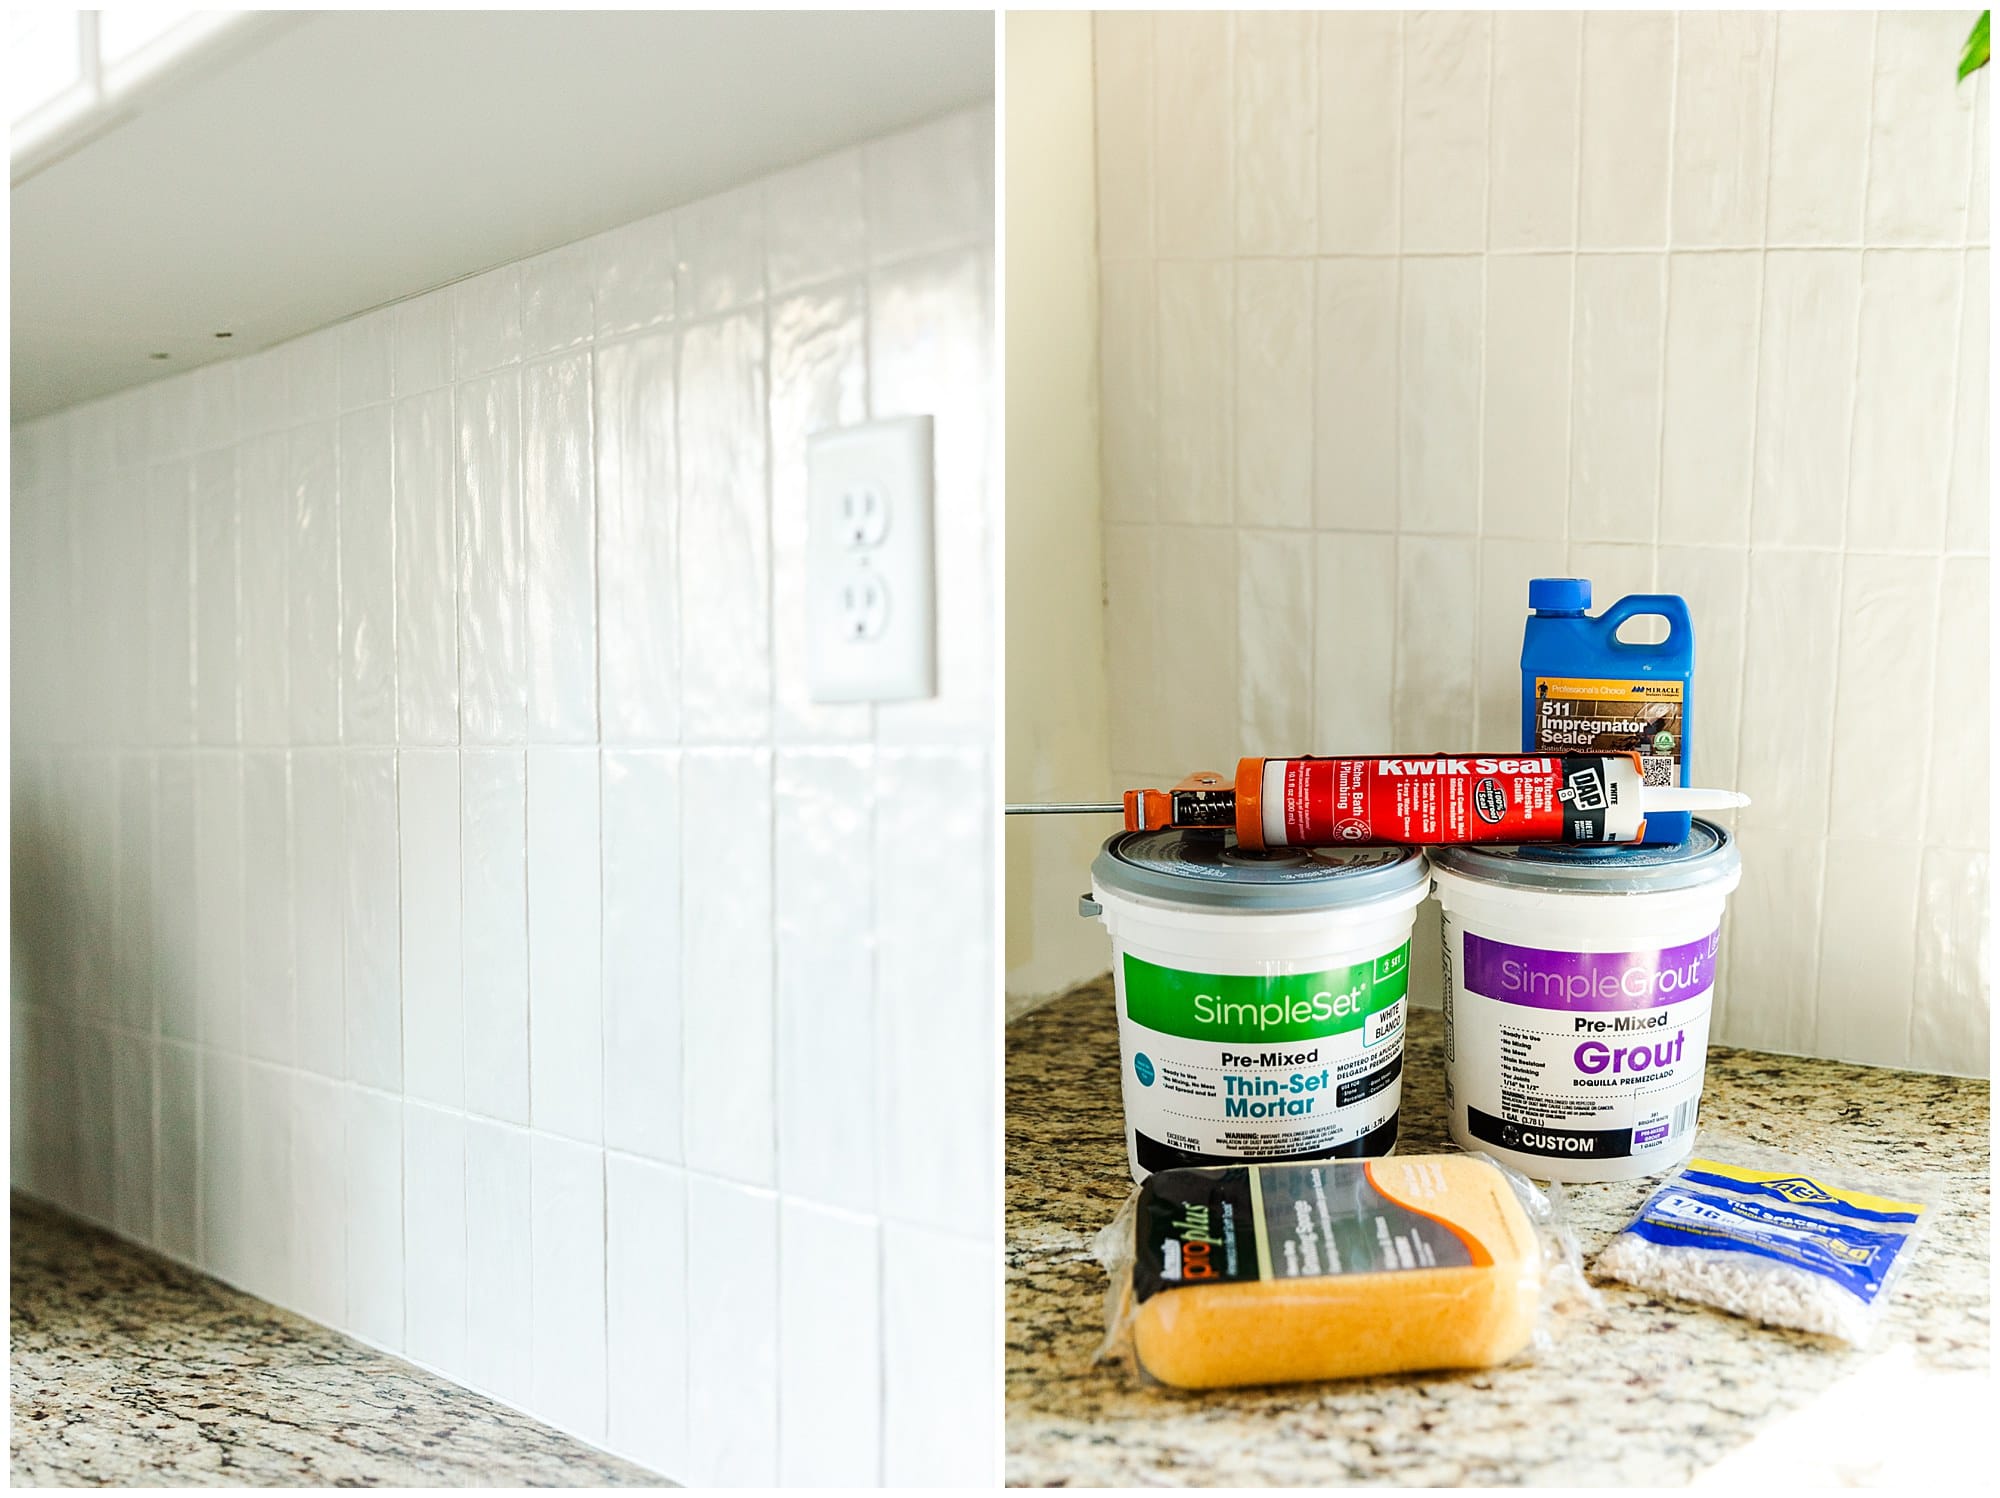
- Tools from HomeDepot: $100 ish
Tools I used with links:

STEPS ON TILING KITCHEN BACKSPLASH:
- RESEARCH– do your research. I watched so many youtube videos to watch because I’m so visual and tactile learner. Here are some of my favs that helped:
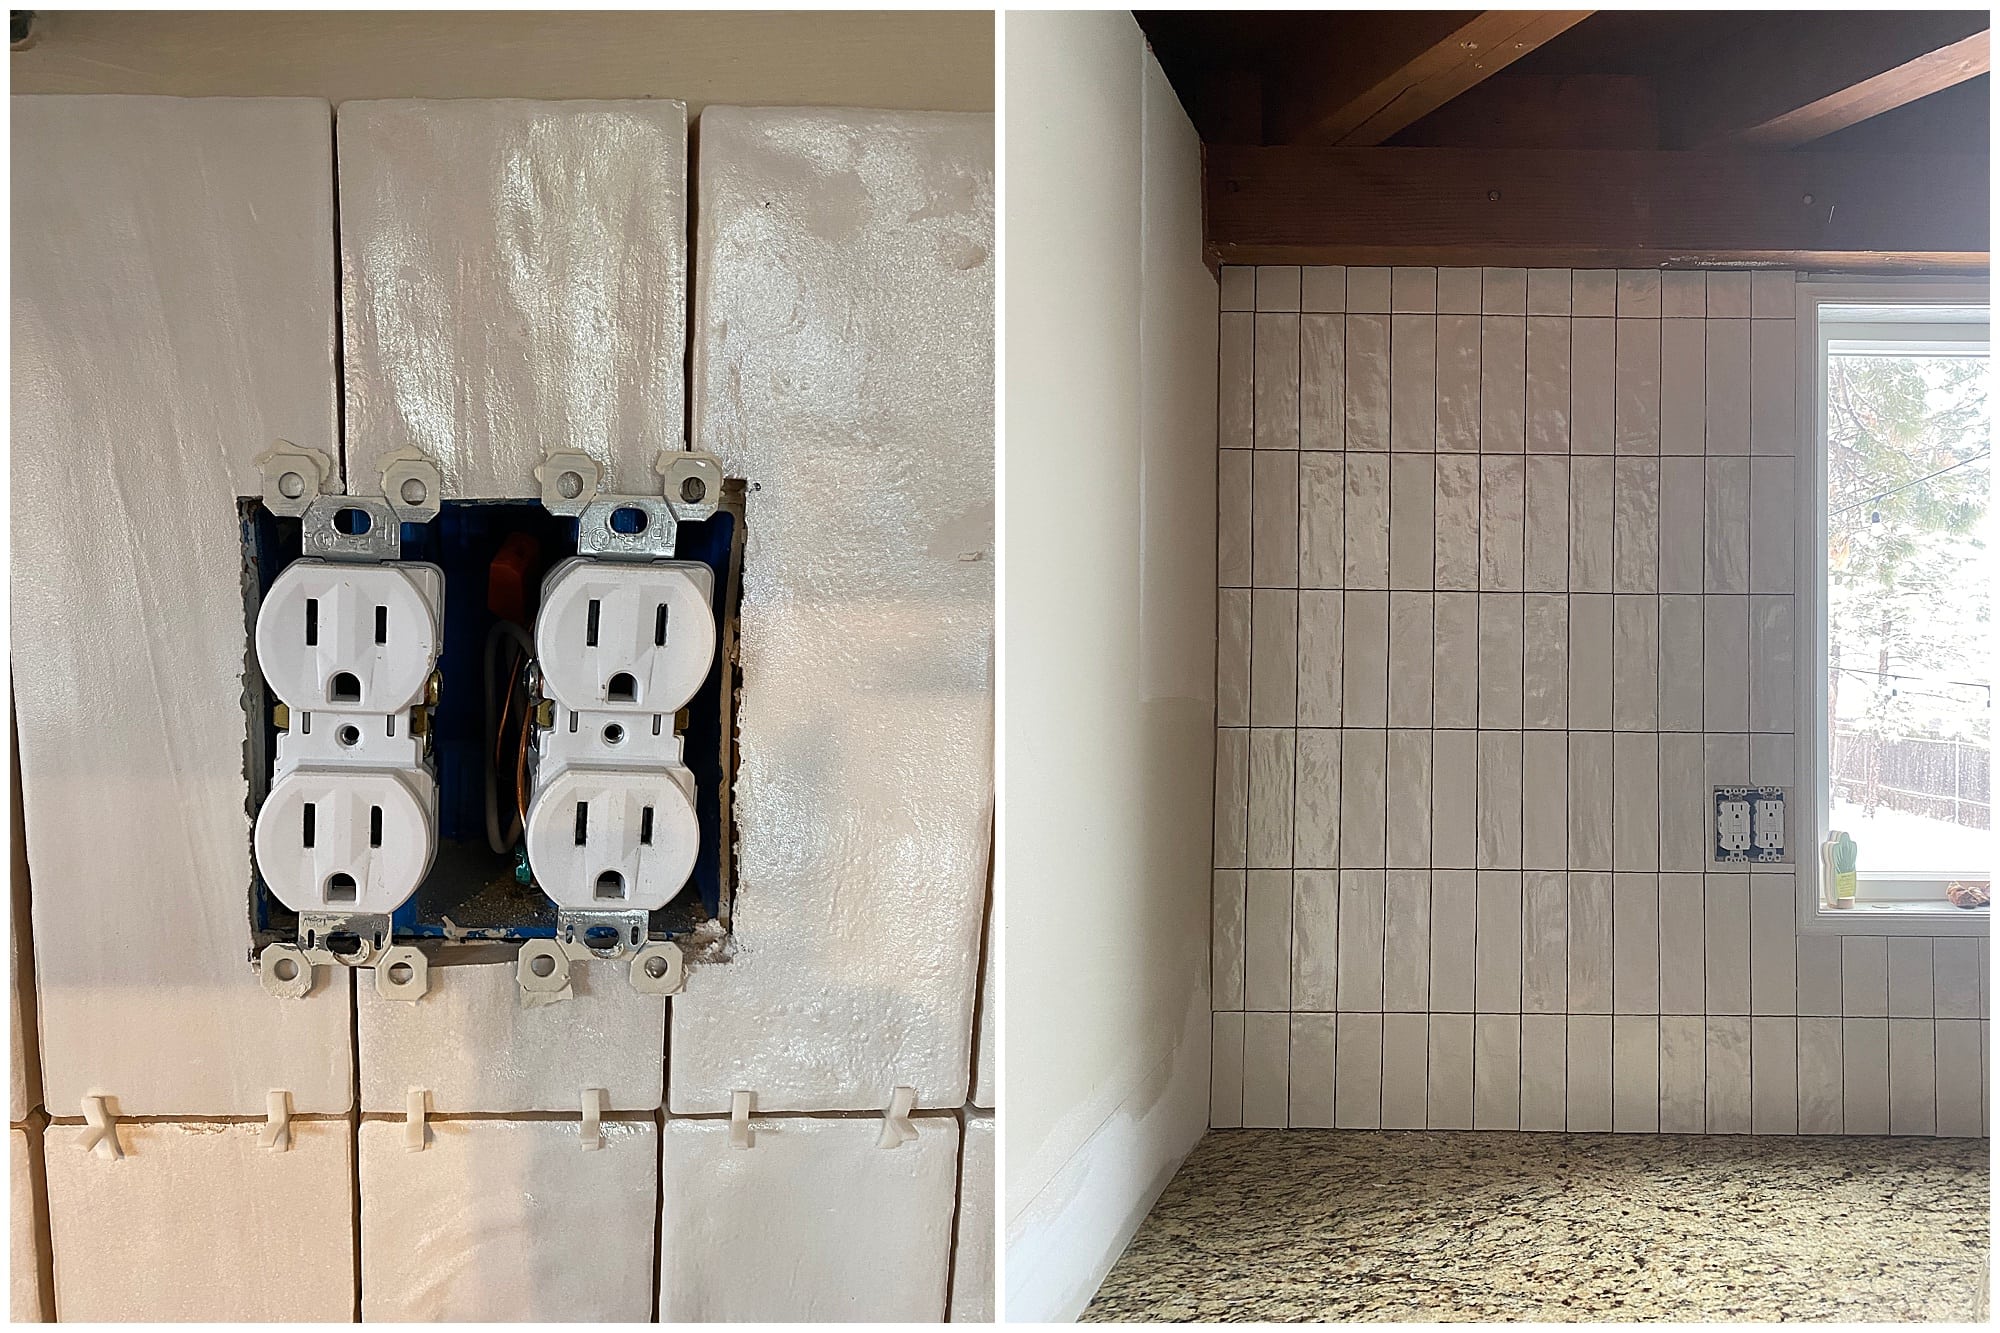
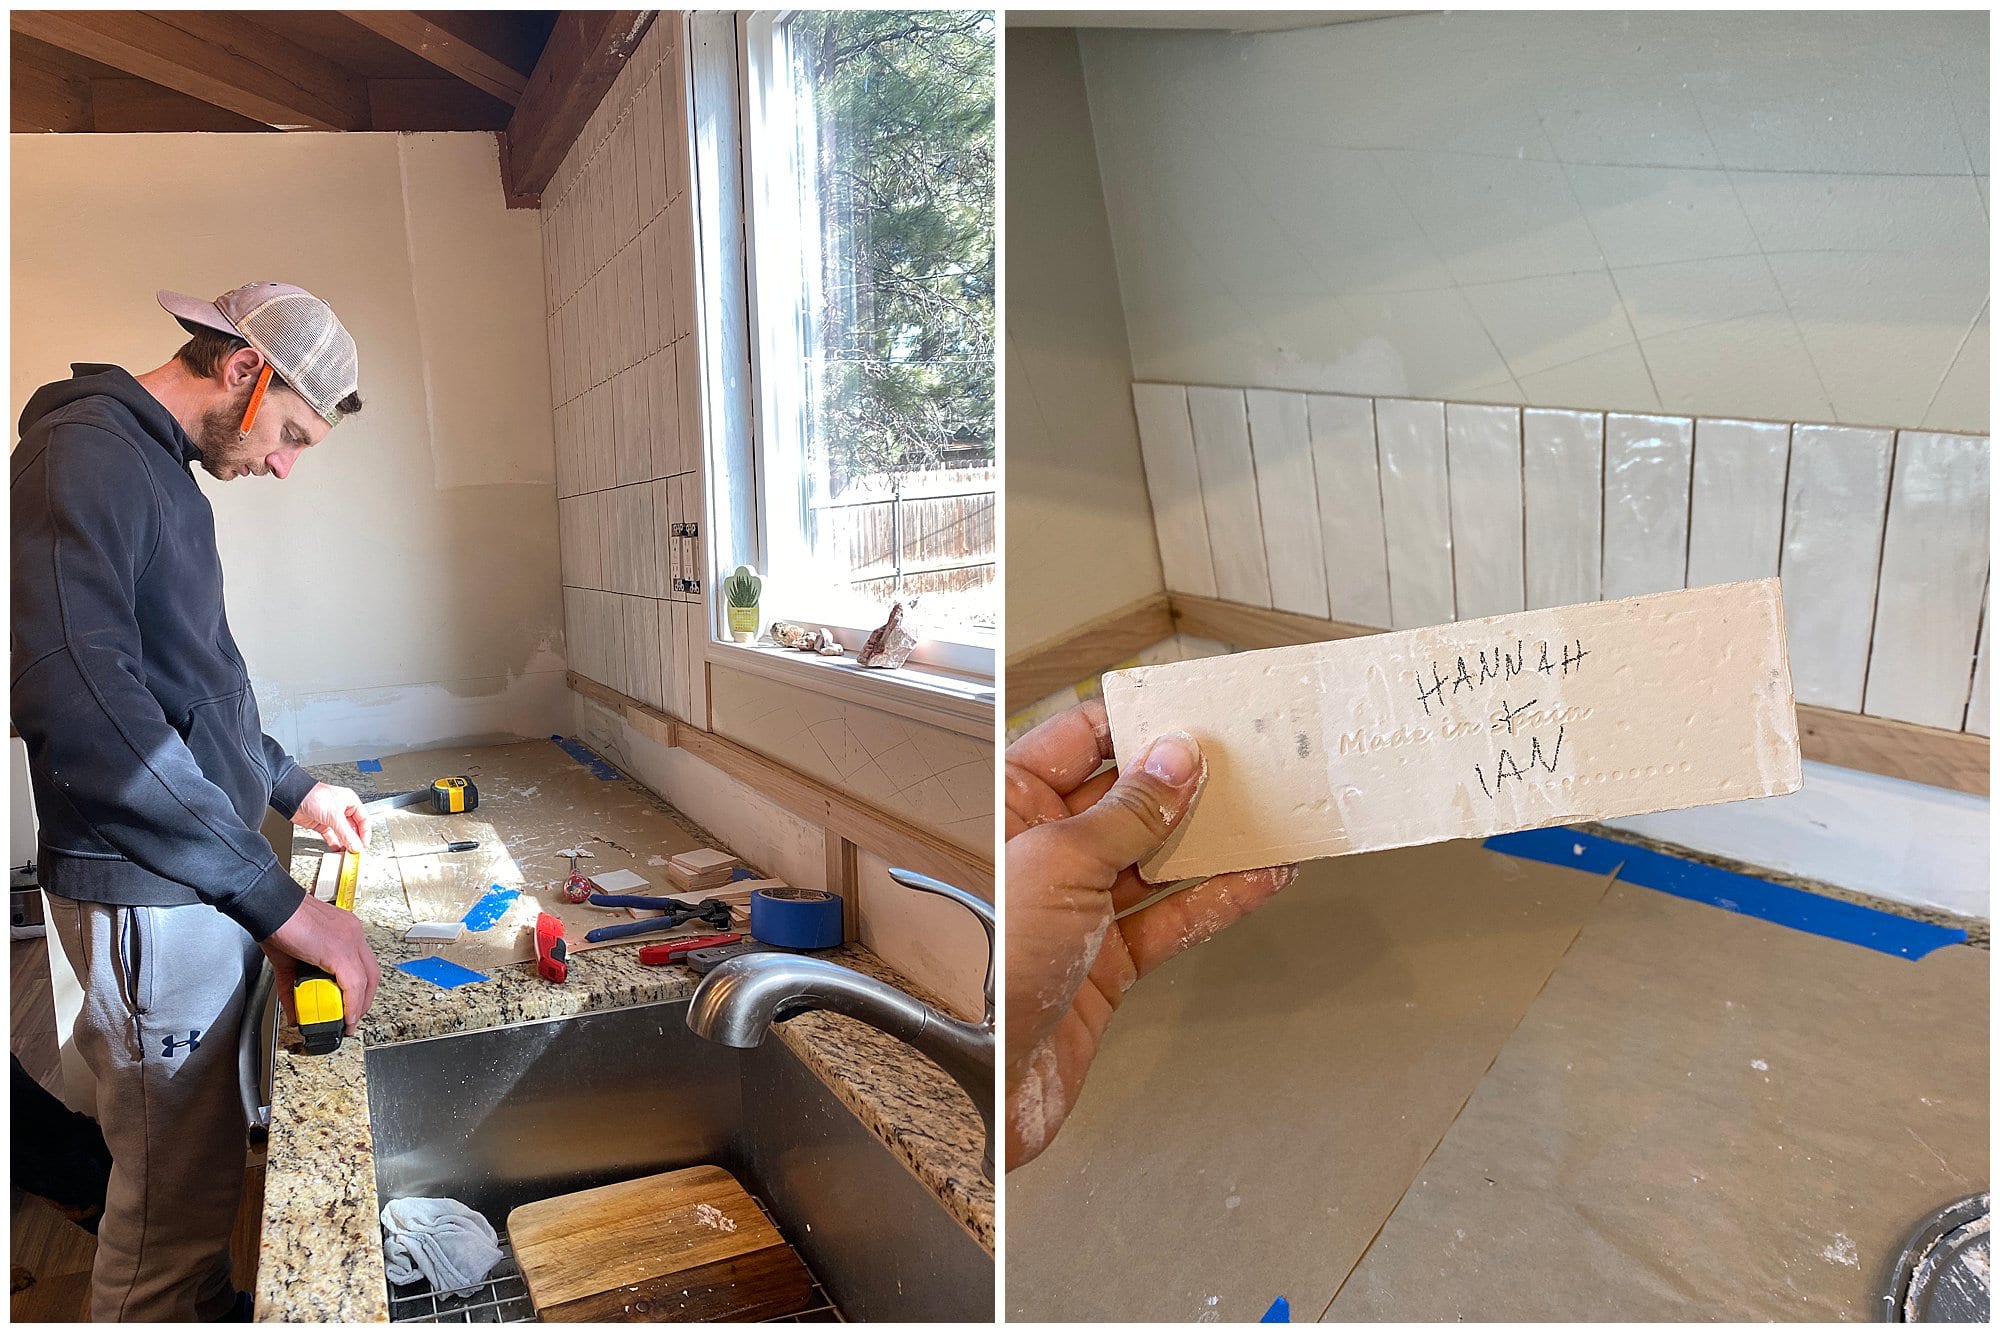
- PREPPING the wall- I took off the granite backsplash that was already present when I moved in. I took a crow bar and hammer and went along the edges to get behind the granite. I did damage the wall a bit so we had to go back through and fix the dry wall. With Quick 5 min mud I easily patched the wall back up. I then cleaned the wall so there was no extra paint chips or anything. We scored the wall with an excto knife so the thin set can stick to something on the wall.
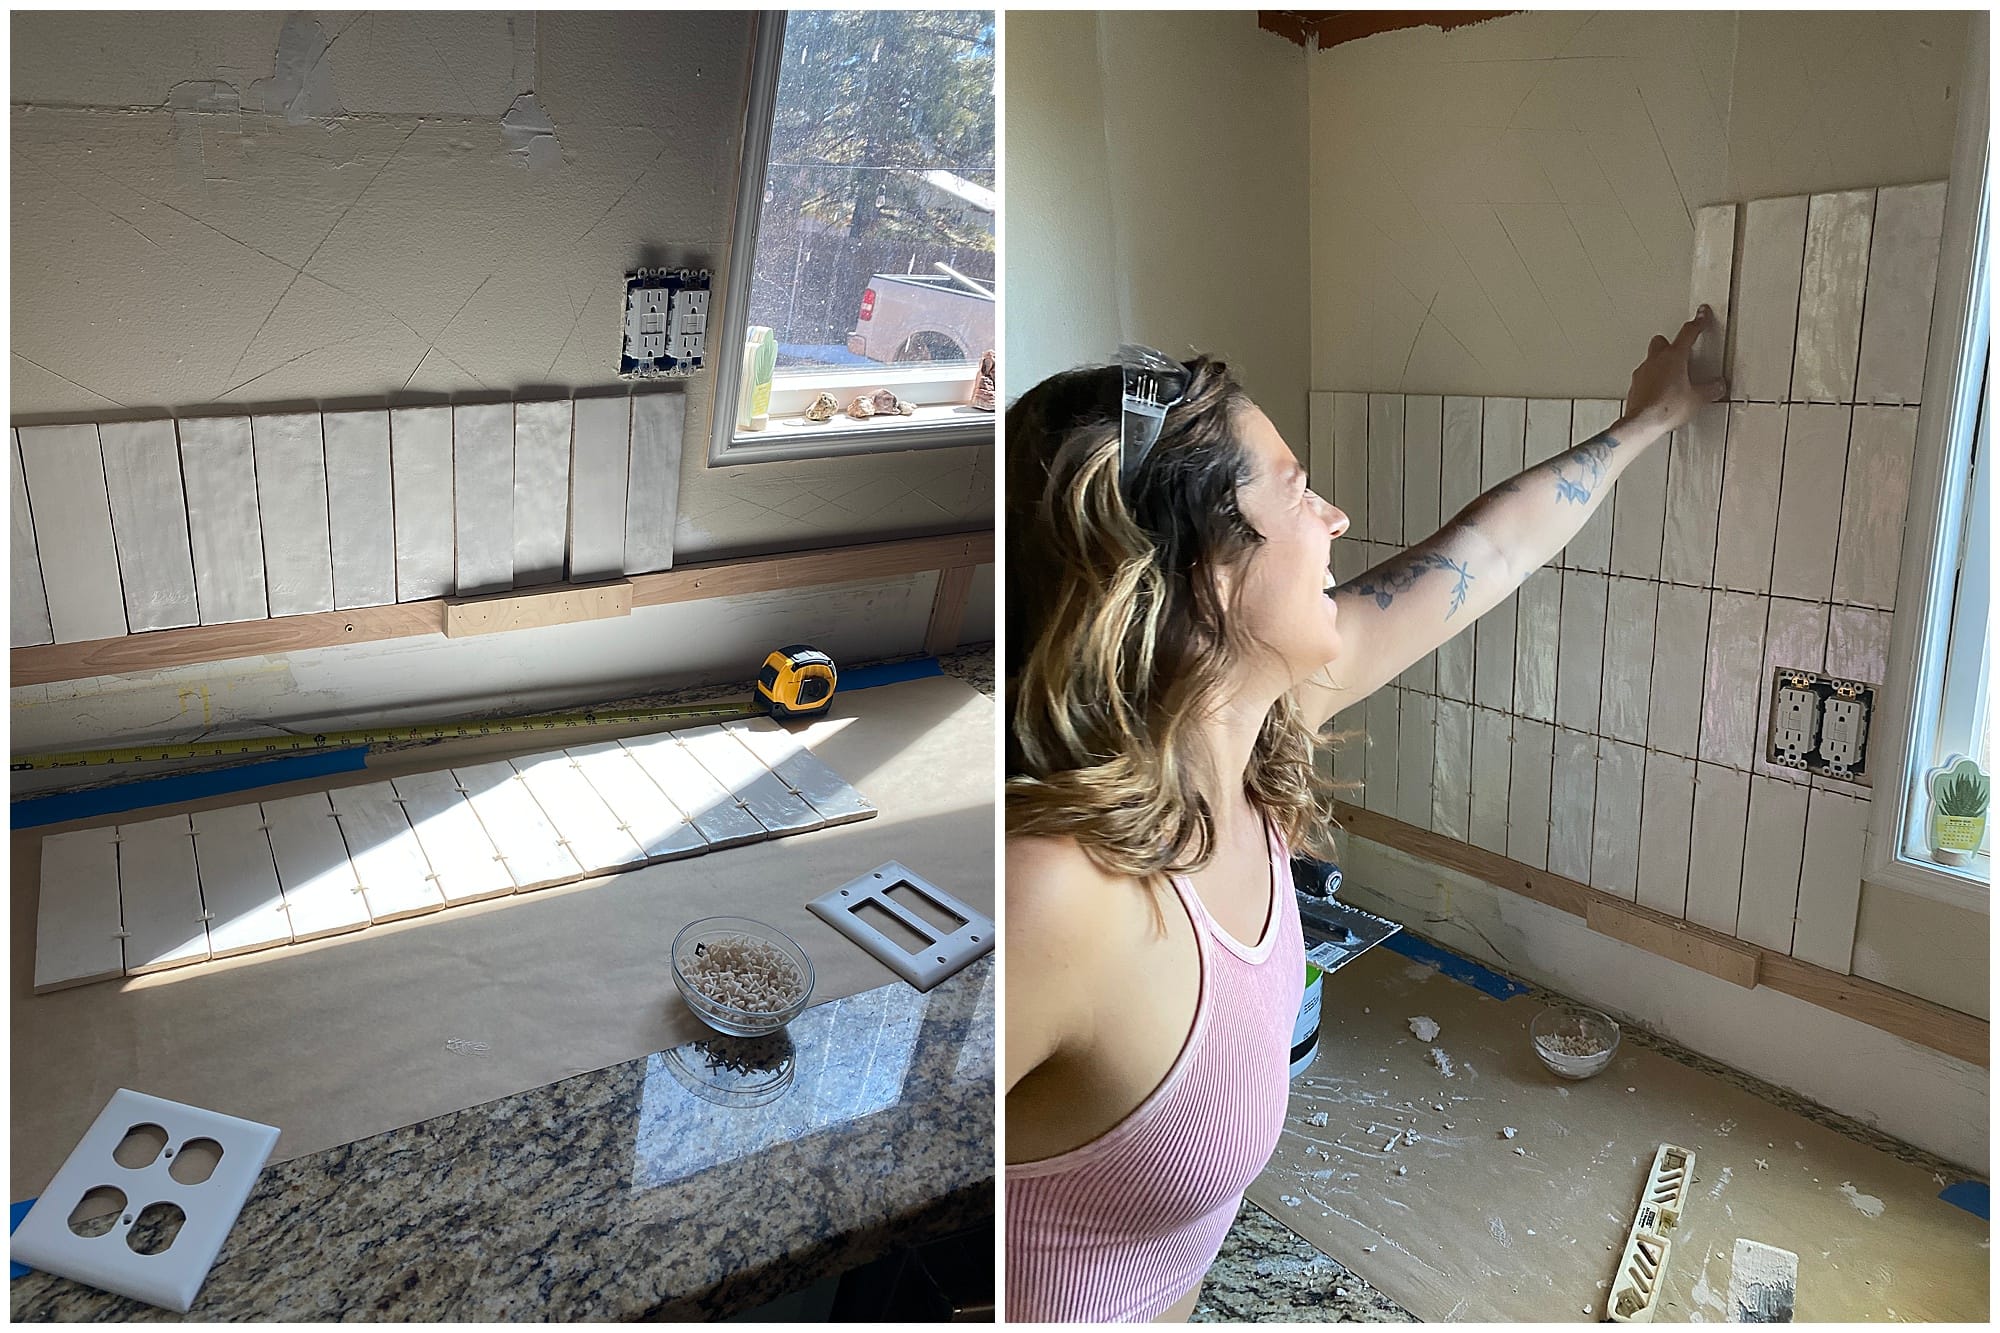
- ORDER-tile in advance so you have it at the house. Always order 10-20% more than you think. I ended up having to order more tile because I ran out. It was a bummer because I was really ready to finish. Measure your space by square footage.
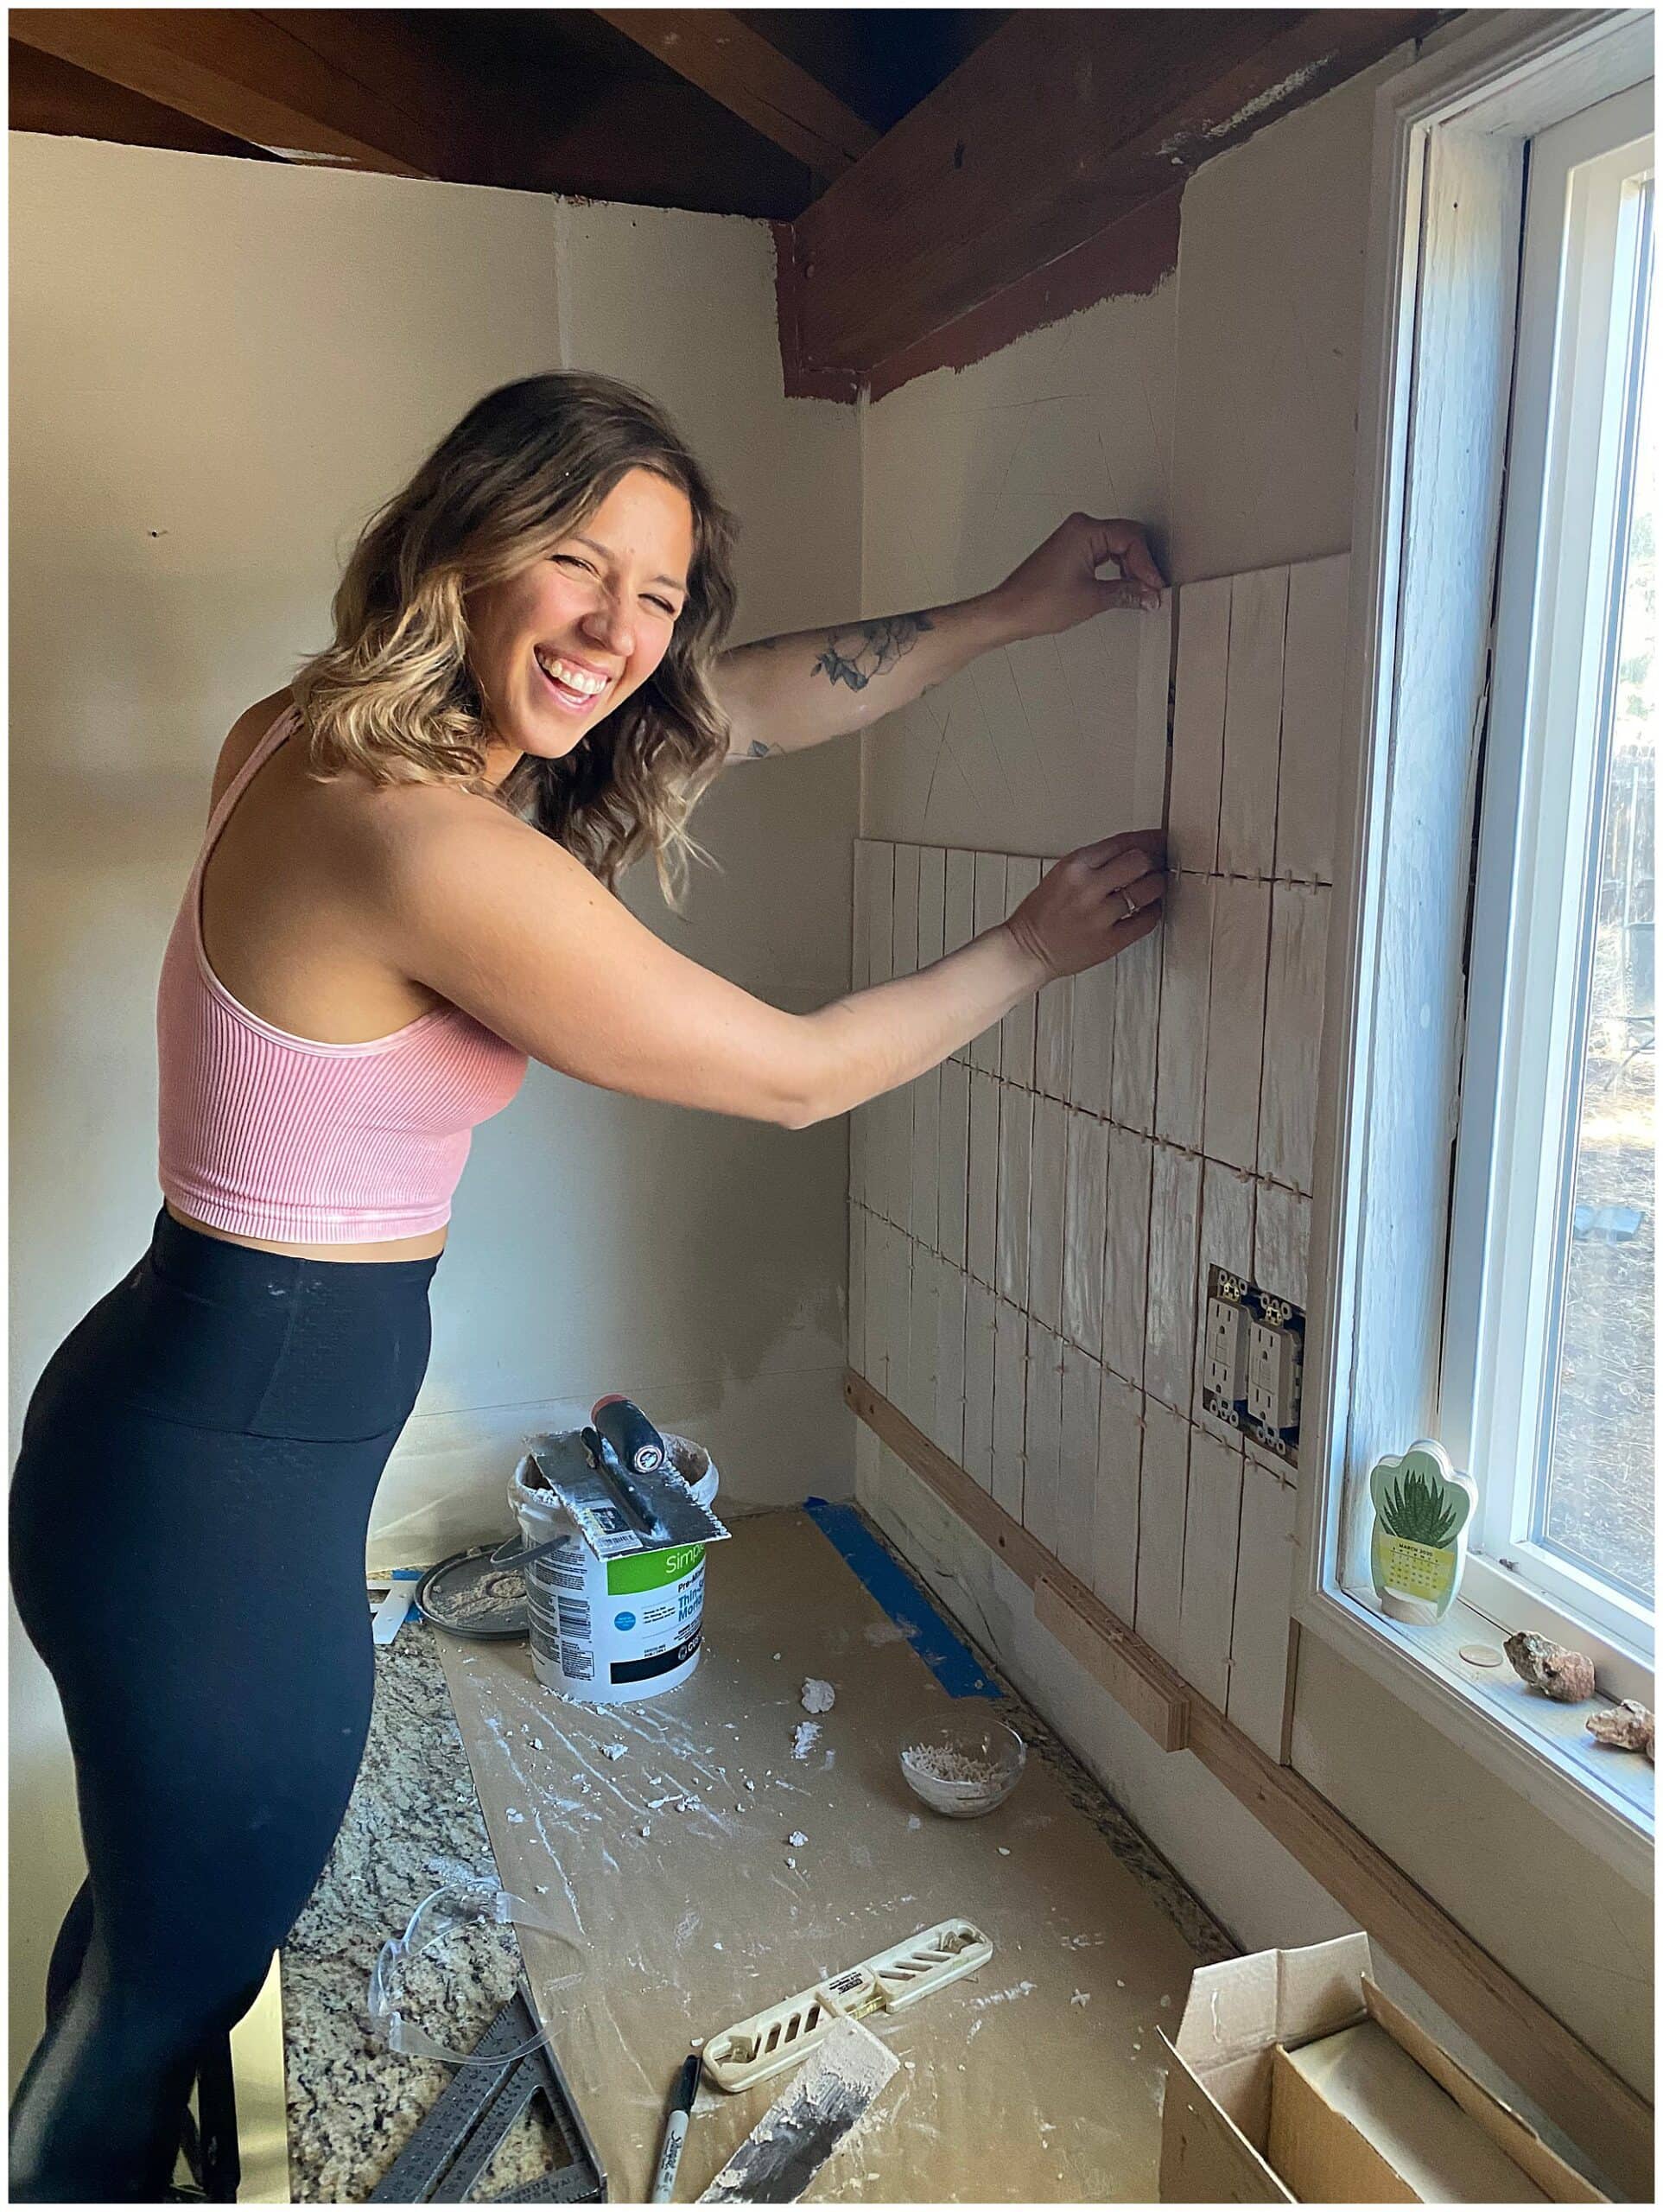
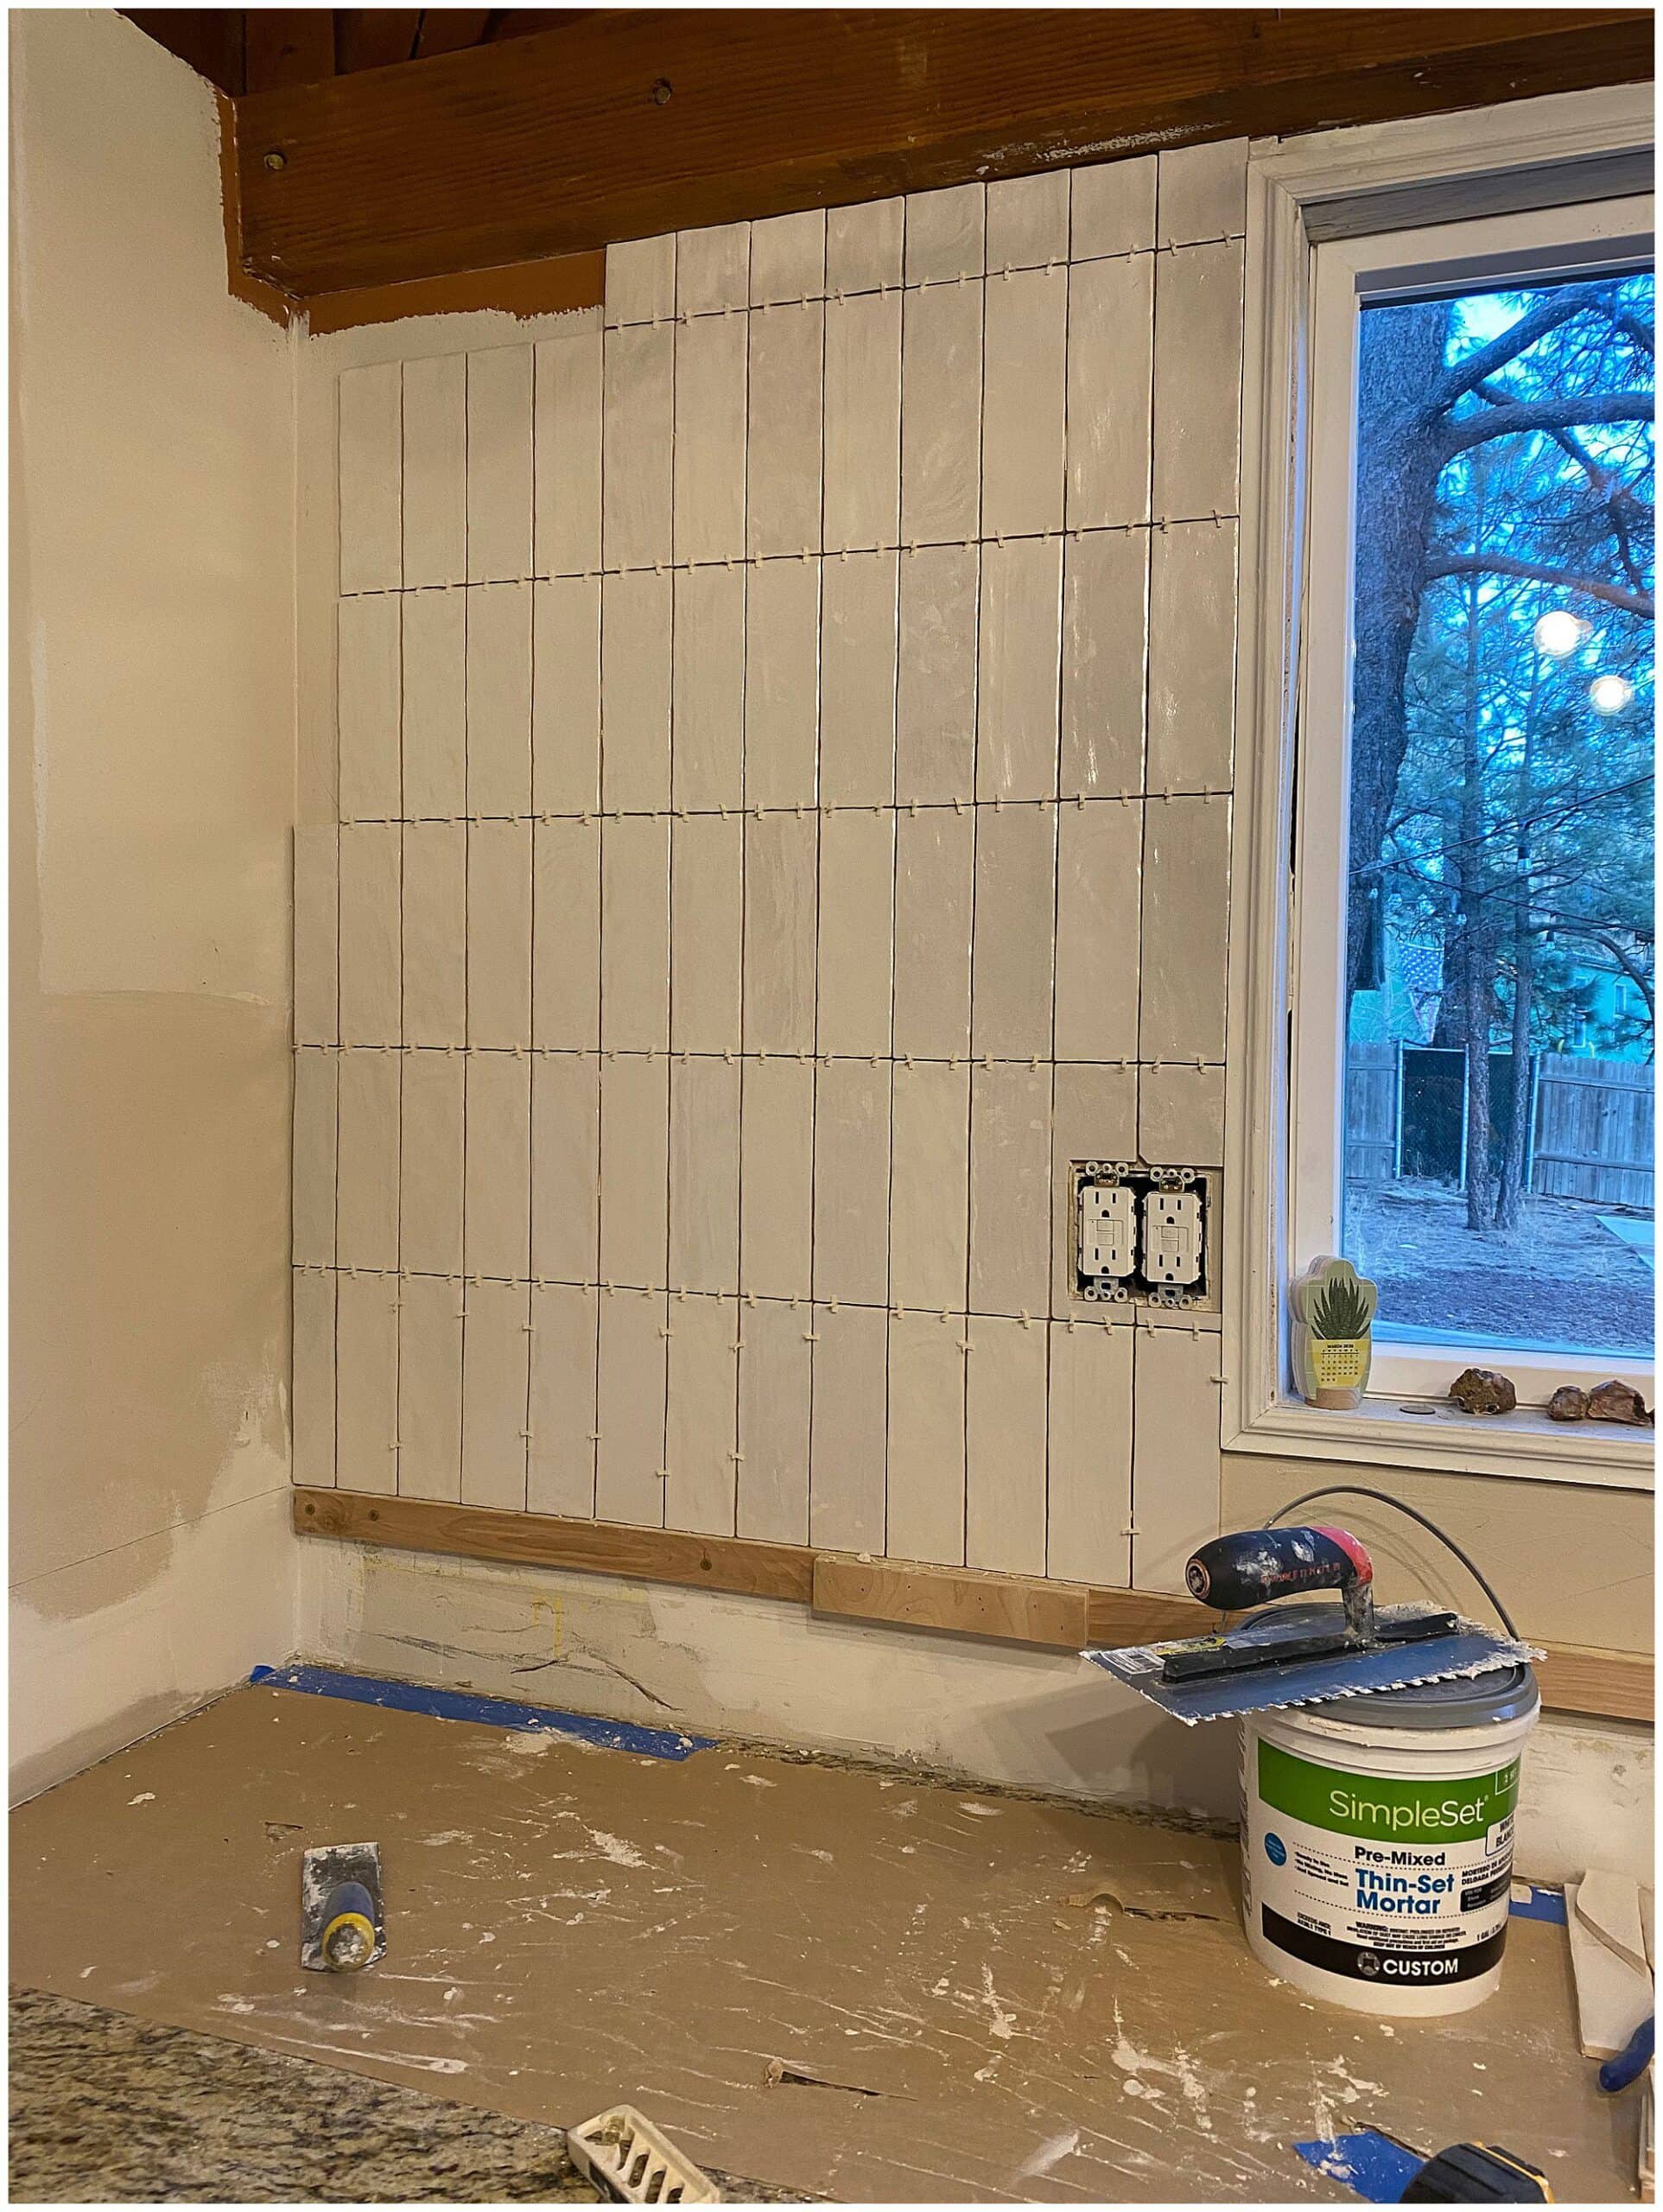
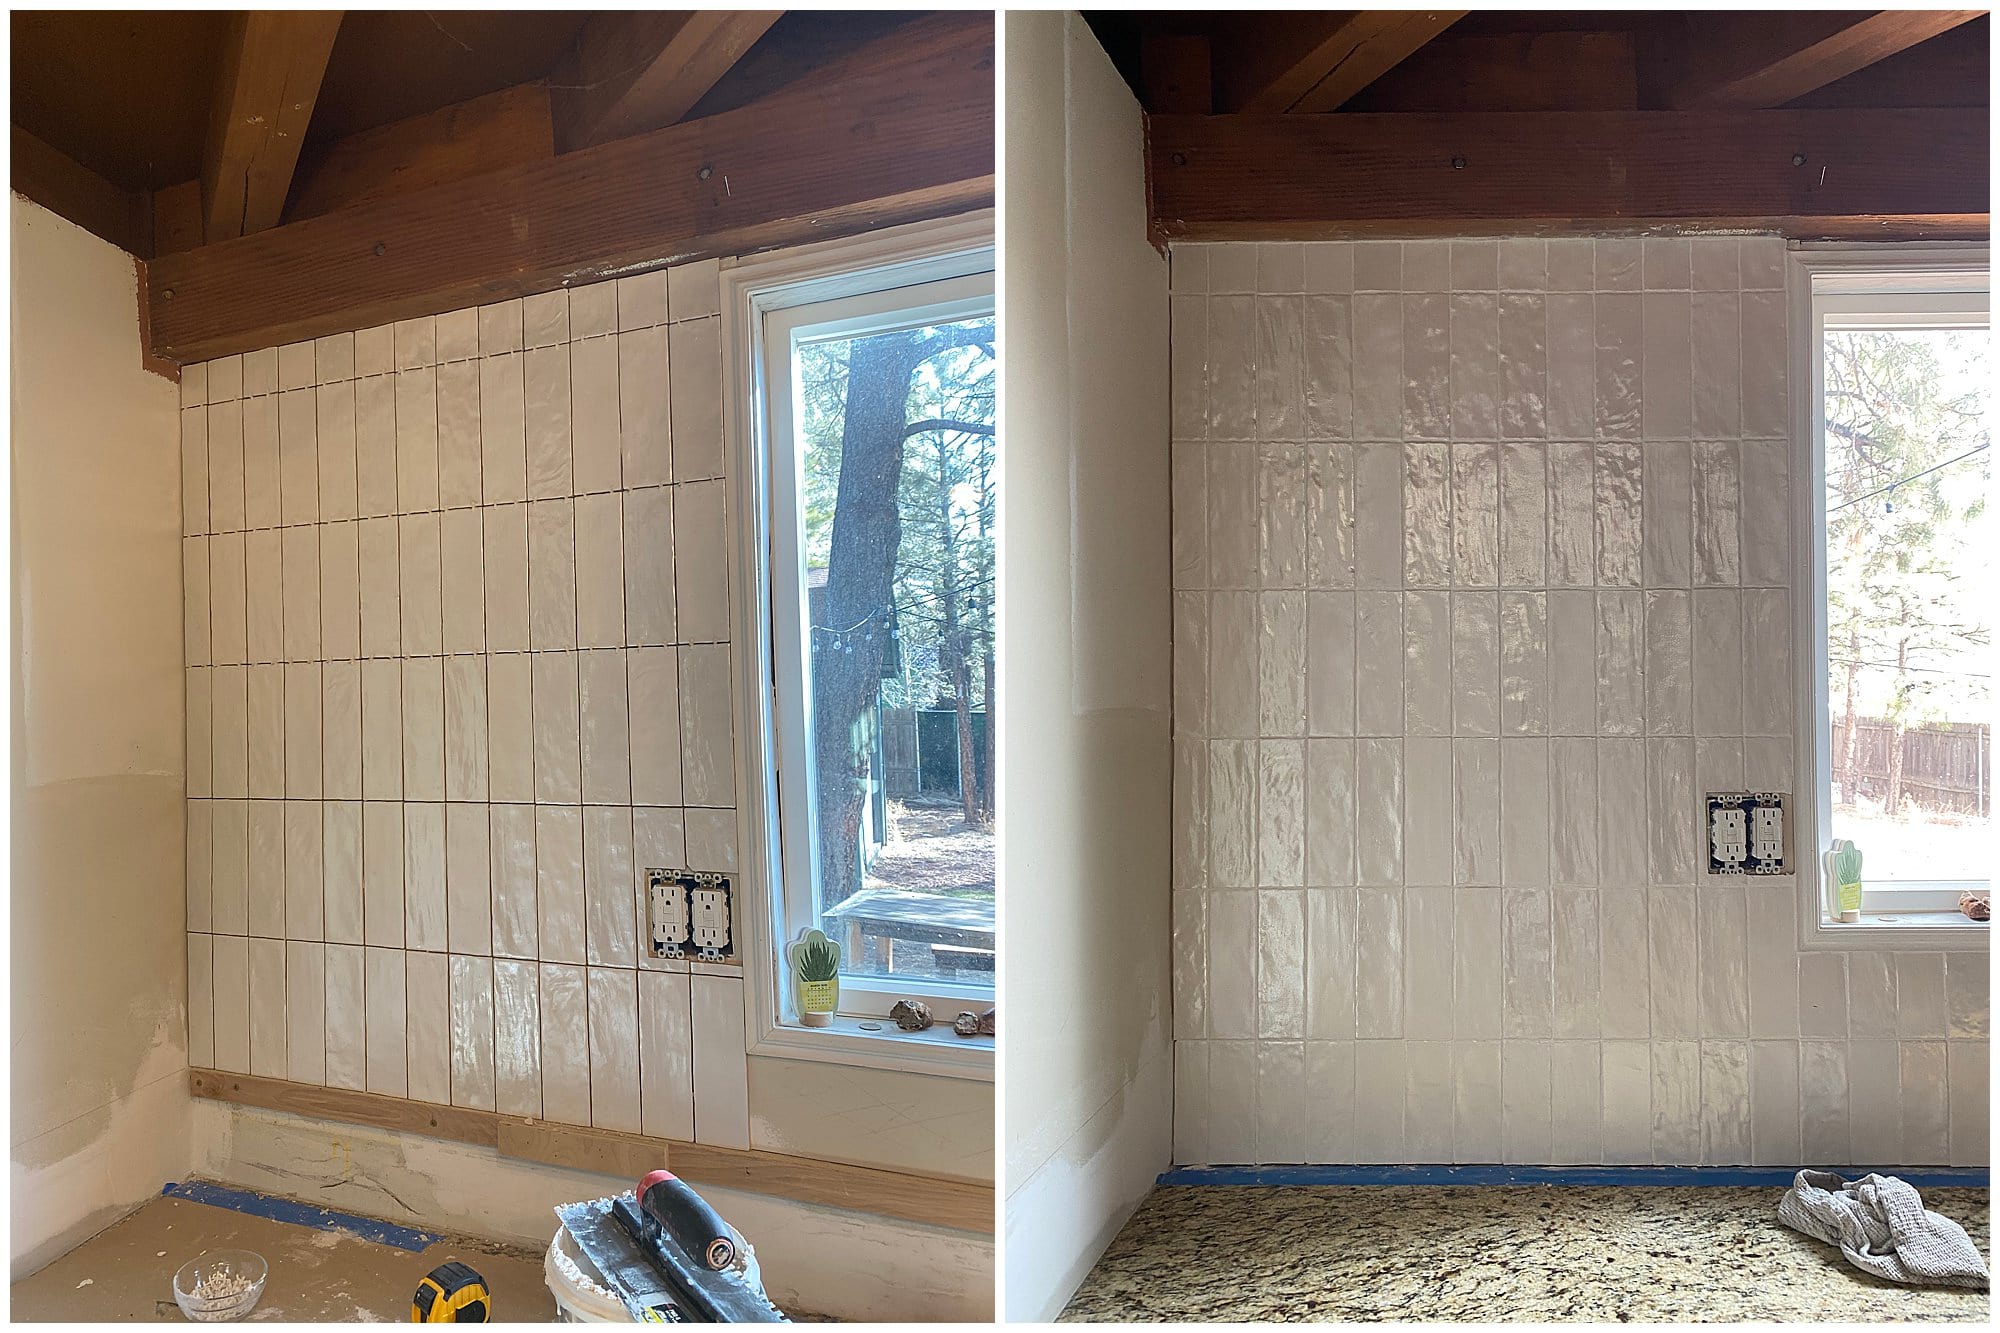
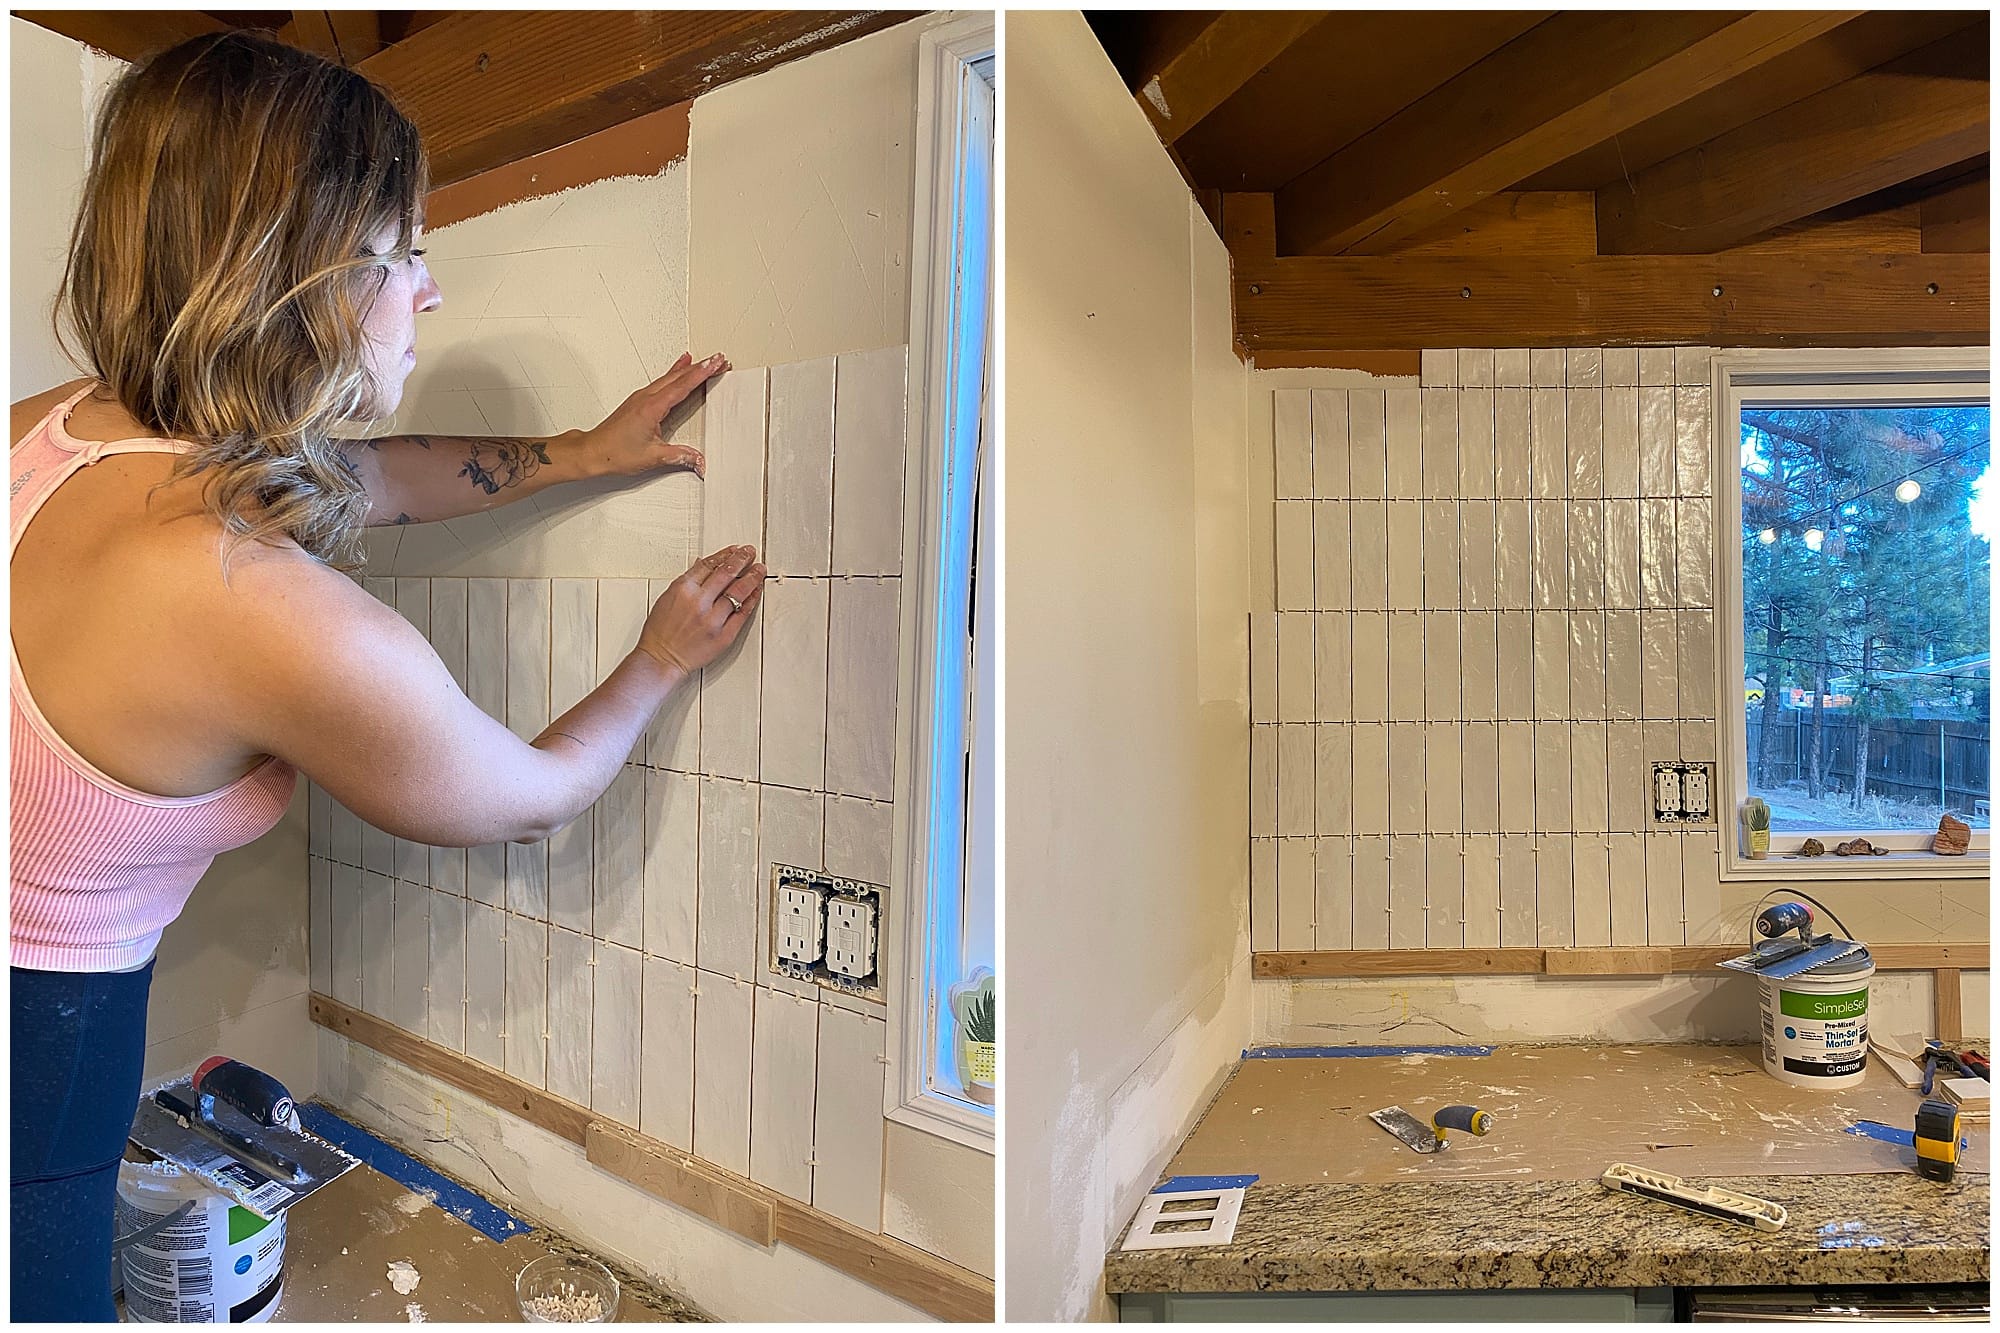
- PLAN-You can either lay out tile exactly with spacers on the wall so you can go ahead and cut all your pieces ahead of time or just go for it. I suggest not just going for it. My wall, floor, and countertops was uneven so I had bit of a math problem to figure out. You want the first row of tile to be on a level surface. If the first row is messed up the whole project will be messed up going up. So this REALLY matters. What a friend of mine did for me was put in a cleat (wood board) measuring all around the kitchen so I had an even level surface to start from. I ended up having to start on row 2 and go all the way up. Then the next day take the cleat off and work down on row 1 measure each and every tile so it was all perfect. This was a hassle and not everyones kitchens are uneven like mine but 100% worth it in the end.
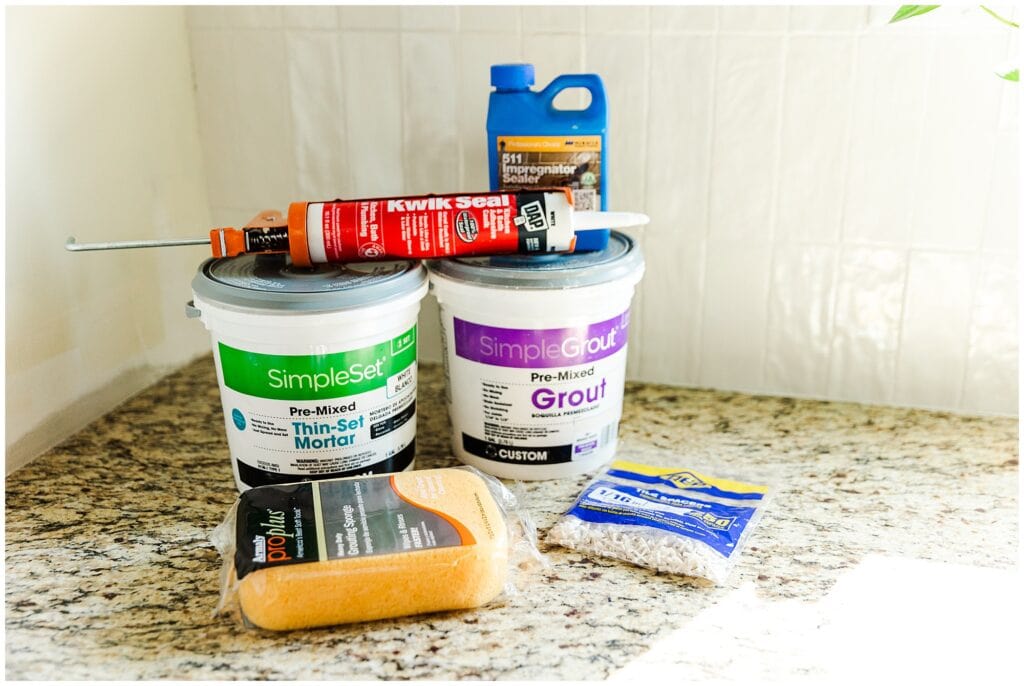
- THIN SET– I back buttered my tile and stuck them right on. A lot of people have opinions on how to do this but I decided to not put a bunch of thin set on the wall first. Many contracting friends who tile for a living told me to just go for it and not put too much on the wall. I slapped on a bunch of thin set and with my trow went down vertical and ones horizontal so it created textured rows for it to stick on the wall and push in for 5-10 seconds.
- SPACERS– My tile was actually uneven and naturally cut so I started with 1/8th spacer but some kept falling out while others stayed. I found it was just easier to do natural because it didn’t make a difference and it was easier. I did put them between the rows vertically because I found the bottom edges were cut more perfectly than the sides.
- CUTTING-this part was really fun but also a bitch. Thankfully I had a wet saw that could cut perfect lines but I do not cut perfect even with a straight edge. I don’t understand. haha. I always would leave a little extra room just incase because you can take more off but you can’t add more. I measured each and every tile and cut along edges and sides. This really matters. My tile was more forgiving it being naturally cut lines and the white grout hide a lot of my mistakes…but still very important to measure twice and cut once.
- LEVEL- make sure every 1-2 tiles you are level on the right side of the tile. The worst would be all the tiles going towards the right or left. But when you are that up close it’s hard to tell…so step back every once in a while and take a small level to check the right side and the top. Move the tile while it’s still moveable!!
- DRY– Let it dry for 24 hours before grouting.
- GROUTING-I ended up going with the already premixed grout and thin set because I wanted to save on clean up. I loved this grout it was really easy to work with honestly but you have to MOVE FAST. I worked in a small space 5 foot ish or less. By the time I was done grouting I would have to go back quickly and clean. So this is how I did my grout: I put it on the grout on grout float and went up at a 45 degree angle. I was told this helps the grout get into the cracks better than straight on. Then to take off extra grout pull down at a 45 degree angle. Try to get off as much as possible so you are not scrubbing away 10 mins later! I actually used my fingers quite a bit to get into cracks and places I otherwise couldn’t with how big my grout float was. Then take WARM water with a sponge and ring it out as much as possible so there is no extra water dripping. Then scrub to get all the grout up. Don’t wait on this!! I did one clean. Then at the end I did another one and a third to make sure there wasn’t anyyyy left over haze. Wait 24 hours before sealing.
- SEALING– this is a smart idea to do anywhere near tile that can get wet or grease on it!! I used this sealer with a cloth and applied it then wiped it off 3-5 mins later. You don’t want it to sit on the surface too long. Let it sit another 24 hours before caulking.
- CAULKING– I actually had a friend do this while I was finishing another project in the house. But I watched him push it out using a caulking gun then with a wet cloth or finger press along the edge so it goes to your desired height. Let it sit 24-72 hours before getting anything wet!
I hope all those steps were helpful!! IT WAS A LOT but also so so so so so so worth it. Reach out if you have any questions!!
YOUTUBE VIDEOS that really helped me!:
- https://www.youtube.com/watch?v=HIyIGJcJejU
- https://www.youtube.com/watch?v=dxPmaMQYkOU
- https://www.youtube.com/watch?v=P871I4H1T1Y
- https://www.youtube.com/watch?v=c_t7EmShAQI
- https://www.youtube.com/watch?v=q7_VDe1vYwk
PLAYLIST we listened to most of the time: Beach music on Pandora + Spotify